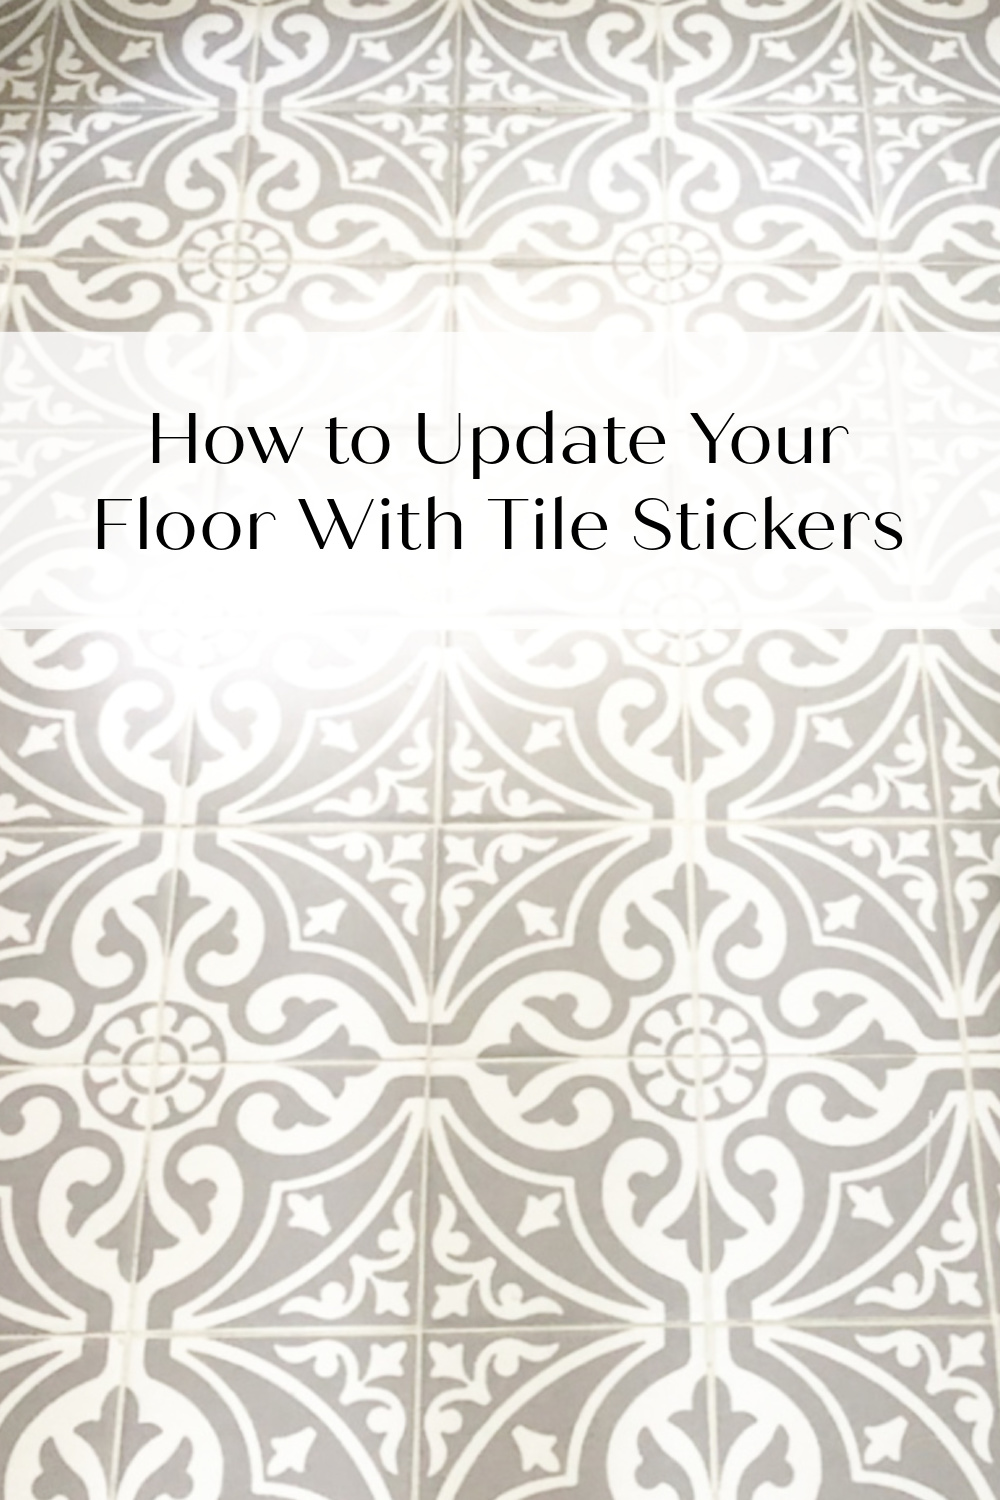
How to Update Your Floor with Tile Stickers
Peel and stick removable tile stickers are a stylish, simple, and affordable solution for updating outdated tile in your home or rental space. See how easy it is to complete this budget-friendly DIY.
Originally shared in the summer of 2018, this post was updated in August, 2022.
This post contains affiliate links. Please see my disclosure policy here. Thank you for your support.
A few years ago, I had updated my first floor half bath on a budget. I had painted the walls, added paintable bead board wallpaper and new molding. The cabinet received a fresh coat of paint with new hardware. However, replacing the dated pink tile was not in the budget. My solution was these stylish vinyl tile stickers.
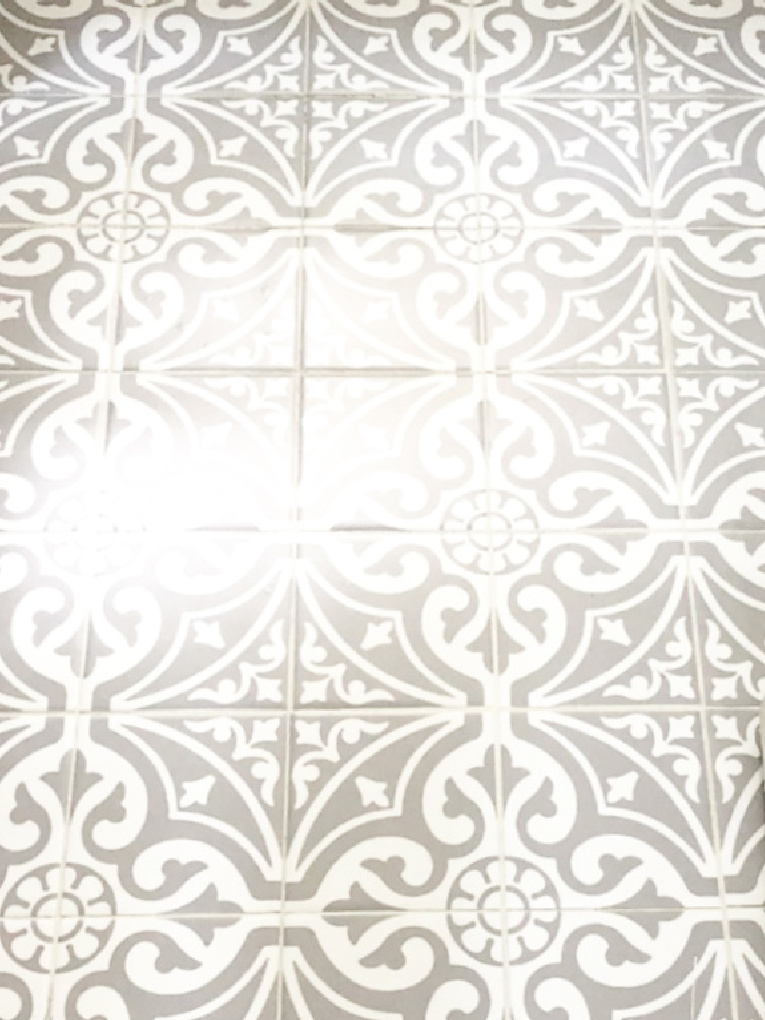
I am happy to report that after four years, these peel and stick vinyl tiles still look great!
What are tile stickers?
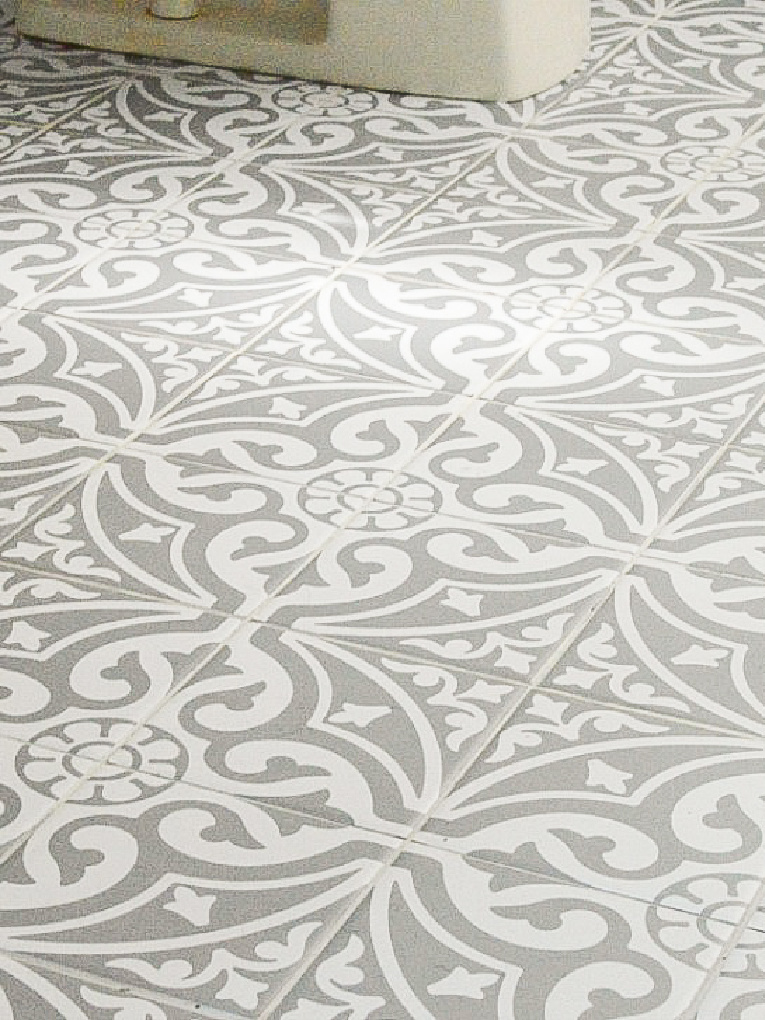
Peel and stick tile stickers are a beautiful, simple, and affordable solution to updating tile in your home. The are made of durable vinyl and are waterproof, scratch resistant, removable, and so easy to install. These stylish vinyl stickers can be cut with scissors or an X-Acto knife, which makes them very easy to customize for your space. Tile stickers come in a variety of patterns and can be used to update a backsplash, wall tile, floor, or stair risers.
What supplies will you need for this DIY project?
- Tile stickers: I purchased my tile stickers from an Etsy Shop called Snazzy Decal. These peel and stick floor tiles from Floor Pops are also very similar to mine.
- Polyblend Grout Renew Colorant in Alabaster
- X-Acto knife
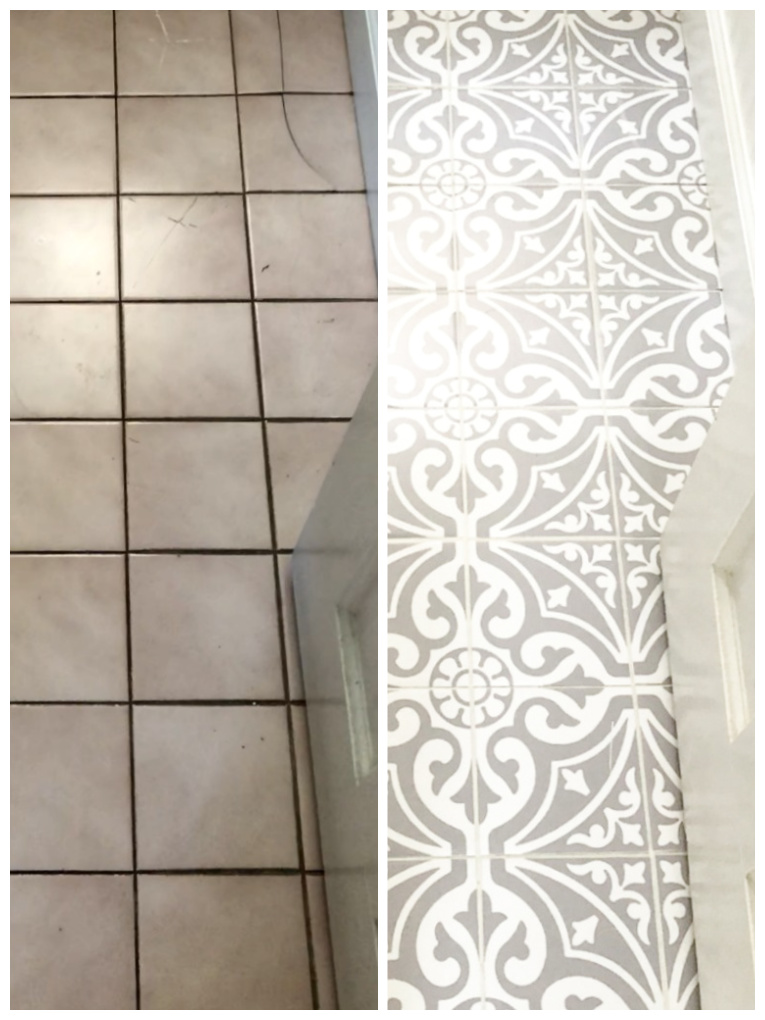
Here was my floor before I applied peel and stick floor tile stickers.

How do you apply peel and stick floor tile stickers to your tile?
- Before I began this process, I watched this video from SnazzyDecal that shows just how simple it is!
- First vacuum and clean the existing floor tiles really well. Once the tiles are clean, let them dry thoroughly.
- Next, repair any cracked tile and then renew the grout. I used Polyblend Grout Renew Colorant in Alabaster to clean up and renew the grout before I began.
- Once any repairs are complete and the grout renew is completely dry, vacuum and clean the floor tiles again.
- Then, lay out your pattern with the floor stickers before you begin.
- To apply the floor stickers, just fold back the backing paper about one inch. Line up the sticker on the tile so that it is straight. I began by laying the whole tiles first, being mindful of the pattern.
- Using a ruler or straight edge, smooth it down as you go.

The process of laying these floor stickers went really quickly. My daughter, Elisabeth, and I took turns laying the whole tiles, before we moved on to the places where we would need to make customized cuts.
How do you make customized cuts in the floor tile stickers?
For the awkward areas, like around the toilet, make a template for the tile stickers by tracing one of the backing papers with a pencil. Then, using a pair of scissors or an X-Acto knife, carefully cut to fit.
Within a couple of hours, my transformation was complete!
Shop This Post

Can you put tile stickers over tiles?
Yes! It is important that the tiles are clean and that the tile stickers fit your tiles properly. You don’t want the stickers to hang over the edge of tile at all. If needed, trim any excess so that the tile sticker fits exactly on top of the tile. Otherwise it would be easy for debris to get caught underneath and for the stickers to peel up.
How durable are the floor tile stickers?
I have had these floor stickers in my first floor bathroom now for the past four years. After one year, I had written a post to share how they were holding up. You can read all about it HERE. They have worn well and are still intact. With daily use, some of the edges have started to peel a bit, which I feel is to be expected after such a long time. Of course, how long they last depends on how much wear and tear they receive.
It is important to note that this is a half bath with no tub or shower. There is not a great deal of moisture in the room. The tile floor stickers only get wet when I clean the floor.
How do you clean the floor tile stickers?
To keep this unique floor clean, I use a Swiffer Sweeper 2 in 1 Mop. I use the dry pads daily and the wet pad as needed. Although the tiles are waterproof, I have been careful not to get them excessively wet.
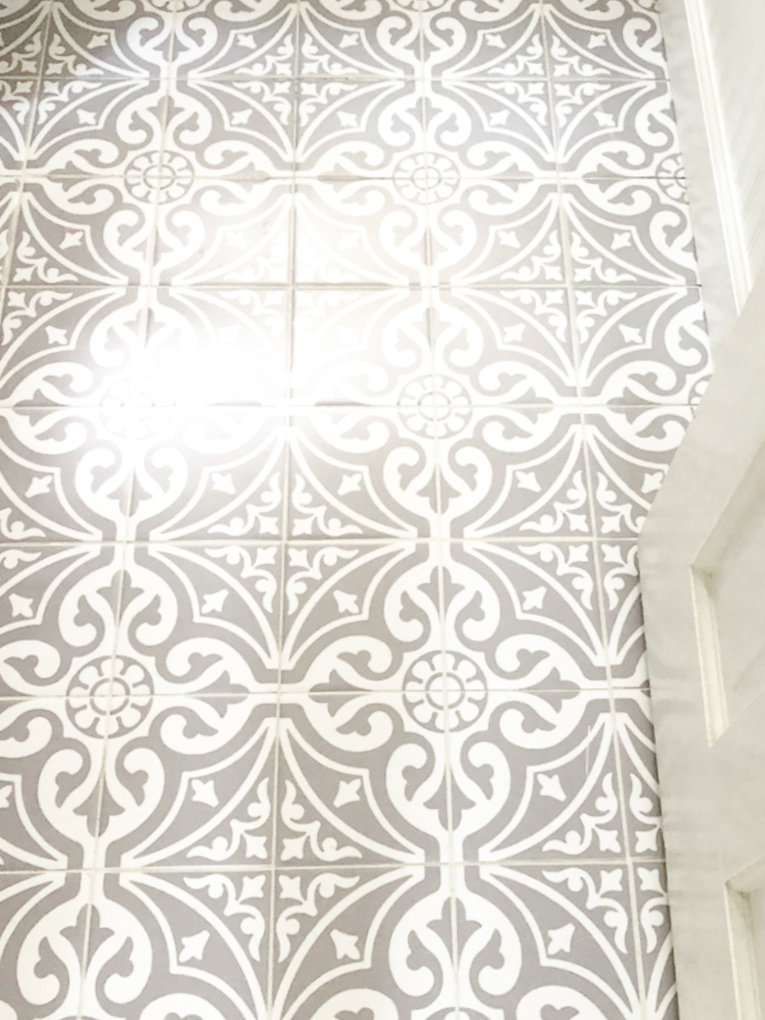
These pretty peel and stick floor tile stickers are a game changer. I love the look of these tiles with the bead board wallpaper! It was so easy to achieve, without the mess of painting or the cost of replacing the tile. This would also be a perfect option for renters, who want to customize their space, since they are easily removable.
Let’s take one more look at this amazing before and after!
Thank you so much for visiting today! I would love to connect with you on Facebook, Instagram, Pinterest, or here on the blog! If you have any questions about this project, please don’t hesitate to ask. Please let me know if you give this DIY project a try. I would love to hear about your projects!


How to Update Your Floor with Tile Stickers
Materials
- Tile stickers: I purchased my tile stickers from an Etsy Shop called Snazzy Decal. These peel and stick floor tiles from Floor Pops are also very similar to mine.
- Polyblend Grout Renew Colorant in Alabaster I used the color Alabaster
- X-Acto knife
Instructions
- First vacuum and clean the existing floor tiles really well. Once the tiles are clean, let them dry thoroughly.
- Next, repair any cracked tile and then renew the grout. I used Polyblend Grout Renew Colorant in Alabaster to clean up and renew the grout before I began.
- Once any repairs are complete and the grout renew is completely dry, vacuum and clean the floor tiles again.
- Then, lay out your pattern with the floor stickers before you begin.
- To apply the floor stickers, just fold back the backing paper about one inch. Line up the sticker on the tile so that it is straight. I began by laying the whole tiles first, being mindful of the pattern.Using a ruler or straight edge, smooth it down as you go.
This looks awesome and seems way more easier then stenciling
Thank you so much, Samantha! I love the look of painting and stenciling, without the time or the mess!
How is this floor holding up to regular wear and tear?
I’m sharing a new post with an update. I hope this is helpful to you, Katie! 🙂
Wow, these look great and it looks like you did a really good and careful job. Do you think they will wear well, and/or will moisture in the bathroom be an issue? The whole updated bathroom looks terrific!
Thanks so much, Janet! I appreciate your kind words. They are waterproof and made of vinyl. So far, they are holding up well. I will do an update in a few months to let you know. 🙂
Hi lynn could you possibly tell me where these tile stickers are from and how much. Many thanks
Hi Julie,
The stickers are from an Etsy shop called Snazzy Decals. The owner is lovely and so easy to work with. The prices are listed in her shop. I hope this is helpful!
Hello! Just checking in to see how that gorgeous floor is holding up over a year later.
We’re starting our downstairs bathroom remodel & I planned on painting & stenciling that tile. Then I stumbled across this today. Anxiously awaiting your response…and praying for good news! I’d LOVE to skip even more painting, if I can!
Hi Jennifer! Good news! After almost a year, the tile stickers are holding up pretty well. The only downfall is that on a few of the stickers, the corners have curled a little bit. Mostly, it is wearing really well. Good luck with your bathroom renovation!
Do you think if you put a sealant over the stickers when you put them down, it would eliminate the corner peels?
Thank you so much for your suggestion, Charity! Please let me know if you try it. Thanks for visiting!
I’ve never seen anything like this product. The pattern is beautiful and really updates your bathroom. Thanks for sharing. Pinning so I don’t forget.
Carol, I appreciate your kind words. It is so wonderful to find a product that works so well. Wishing you a wonderful week!
What a creative way to update your tile floor! I was not aware of this option and I love how it looks. You did a great job!
I really appreciate your kind words, Candi! This product is really a great alternative to replacing tile. Best wishes for a great week!
This is amazing Lynne! Looks highly professional, you did such a great job on this! Love that she was able to alter the shade a bit to suit your needs, what a great product!
Thank you so much, Lisa! I appreciate your kind words. It really is a great product and I am so happy with the results. Wishing you a wonderful week!
I have to do it in our bathroom, it’s black and white tiles that they need these kind of pretty details.
I hope you give this product a try Fiorella! I will do a post in about 6 months to share how they are wearing. 🙂
Woot!!! Just found this on Home and Garden Thursday… I’ve contacted the company, but haven’t followed through with their reply! I’m so excited… this looks AMAZING! I’ll feature it next week on my Tuesday Turn About post! 😉
Thank you so much, Julie! This product is really a great alternative to replacing tile. I hope it works out for you. THANK YOU for featuring it on your Tuesday Turn About post! 🙂
This is absolutely amazing. What a cool idea. And it turned out gorgeous!! Pinning! 🙂
#SYClinky
Thanks so much, Jennifer! It really is a great alternative to replacing tile. Hope you are having a wonderful week! 🙂
Wonderful. Great idea. I’d like to make over my bathroom floors, too. I’ll wait to see how your “new” floors wear.
Thanks so much! I will do an update in about 6 months to share how they are wearing. Have a great week!
Really turned out nice. I love the design! Thanks for sharing with SYC.
hugs,
Jann
I appreciate your kind comment! Thank you for hosting SYC! Best wishes for a wonderful week!
These look amazing Lynne! I have tile in my laundry room similar to yours, and this would be a perfect update. I’m definitely going to check out SnazzyDecal! I can’t wait to learn about the bead board wallpaper!
Thank you so much, Rebecca! This is definitely an easy and affordable solution to replacing tile. I hope you give this product a try!
Lynne, Very interesting product! Beats replacing tile for sure. Lovely pattern you selected. Have a great week. Sylvia D.
I appreciate your kind comment, Sylvia! It really is a great alternative to replacing tile!
This looks great, Lynne! What an easy way to update the floors. Thanks for sharing at Snickerdoodle. Pinning.
Thank you so much, Beverly! Wishing you a wonderful week!
Amazing transformation I cannot believe how your floor turned out. Thank you for sharing, Kippi
I appreciate your kind words, Kippi! Best wishes for a great week!
Your floor looks wonderful!! I’d love to try this!
Thanks so much, Lauren! It really is a great product for updating tile!
What an interesting idea. We need to do some bathroom work soon. This might be the way to go.
Thanks so much, Scott! It really is an easy and affordable solution to replacing tile.
This is an amazing product. The floor looks wonderful. Thanks for sharing at Snickerdoodle Create Bake Make Party.
Thank you so much! Best wishes for a great week, Debra!
Hello Lynn!
This is the first time I have looked at your lovely blog and I liked it well enough to give you my email address so I can now receive it on my own.
I felt an instant connection when I read about how you are now a caretaker for an Alzheimer patient. My heart goes out to your patient and also to you. My Dear Mom was an Alzheimer’s patient and I was her caretaker. It was a most difficult time and I suffered more than I can say! She was wonderful. I was pitiful. As you know, watching someone about whom you care for so much is painful, I hope you are getting along alright and not having the stressful time with which I was so terribly troubled. With your okay, I will keep you in my prayers.
Your bathroom is just lovely!! The bead board is fantastic! I have always been fond of bead board and yours is particularly good looking! The paint color is perfect and needless to say, the peel and stick tiles on the floor are amazing!!!
You are obviously not a first time remodeler, Lynn! I’m afraid your talents give you away! Excellent job and one you will enjoy for years to come!
Thank you so much, Lucy, for your kind and thoughtful comment! I appreciate you sharing your story with me. I am so sorry for what you experienced. Alzheimer’s is such a cruel disease for both the patient and the caregiver. Your kindness and prayers are very much appreciated.
I am so glad you enjoyed the bathroom updates. Thank you so much for subscribing. I look forward to connecting more! Best wishes for a great week!
I’ve been wondering about sticker tiles for the floor as I want a ‘rug’ under the dining table, but know it isn’t practical. Tile stickers might work well and would love to know how these hold up over time. Will be checking back for an update.
Hi Erlene! Thank you for your comment. Sounds like this product might be a good option for you. I am planning to do an update in about 6 months. Wishing you a great week!
Hi Lynne, love how your bathroom floor turned out! <3 Great idea! Stopping over from this week's Snickerdoodle Create Bake Make link party. 🙂
Have a great week,
Barb 🙂
Hi Barbara, Thank you for your kind comment and for hosting such a fun link party! Best wishes for a wonderful week!
Wow, that looks great! I wish I’d found this a few years ago as a temp fix for our bathrooms, but, we are about to renovate them completely. Thanks for sharing at #HomeMattersParty
Thanks so much, Emily! It is a great product. Best wishes with your bathroom renovations!
Wow, such a great result…gorgeous. Such an encouraging, DIY…I am wondering Is there an odor while applying or an off gassing afterwords ? Did you purchase extra to allow for error? Do you think this product could be used in an application as a back splash? I wouldn’t think it would work on a tile “Kitchen” countertop, though. Thank you. Kindly, Chris Ann
Thank you for your kind comment, Chris Ann! There was a little odor of vinyl that dissipated quickly. I did purchase a few extra tiles to allow for error. I think that it would work well as a back splash, but I am not sure about a countertop. If you contact the owner, Pauline, I am sure she would be able to give you some feedback. Please let me know if this product works well for you.
Oh my goodness! This looks great, and what a fantastic alternative. Thanks for sharing at Sweet Inspiration!
Thank you so much, Amy! Best wishes for a great week!
Looks great and seems easy enough that even I could do it.
Thanks so much, Alicia! This project was so much easier than I thought it would be. I hope you give this product a try!
What an update!! I love that pattern!
I’m curious to see how this is holding up! It’s now about 6 months since this post and im dying to know! ❤️
Any update on the wear of these tile stickers?
They are wearing well! They are in a half bath. There is no tub or shower, so there’s not a great deal of moisture in the room. A few of the tile stickers have curled in the corners, but I had extras so they were easily replaced. I would definitely use them again. I hope this is helpful to you!
Hi, I love the way your bathroom floor came out! Can you share how they are wearing since it’s been about 10 months?
Thanks so much, Lisa! I have a post planned to update. The tile stickers are holding up well! There are a few places where the corners have curled a bit, but most of all, it is wearing well.
How has this held up in the time that has passed?
Seriously??? This is so cool! I had no idea this was even a thing!
I know, right?! And they have held up pretty well over this past year! 🙂
The bathroom looks great! What did you do with the “not white” grout? Did you just cover the grout lines or cleaned or painted them? What size are your tiles? Thinking about my laundry room!
Hi Kristi! Thank you for your kind words! The product I used on the grout lines is linked in my original post. It was very easy to use and has held up pretty well too. My tiles are 4 inches by 4 inches. Please let me know if you do your laundry room. I would love to see it!
Looks great! I am thinking about doing this in my half bath. Do you remember what the color was of the grout renew product you used?
Thanks so much, Suzanne! Please let me know if you do it. I would love to see a picture of how it comes out! I used Grout Renew in Snow White.
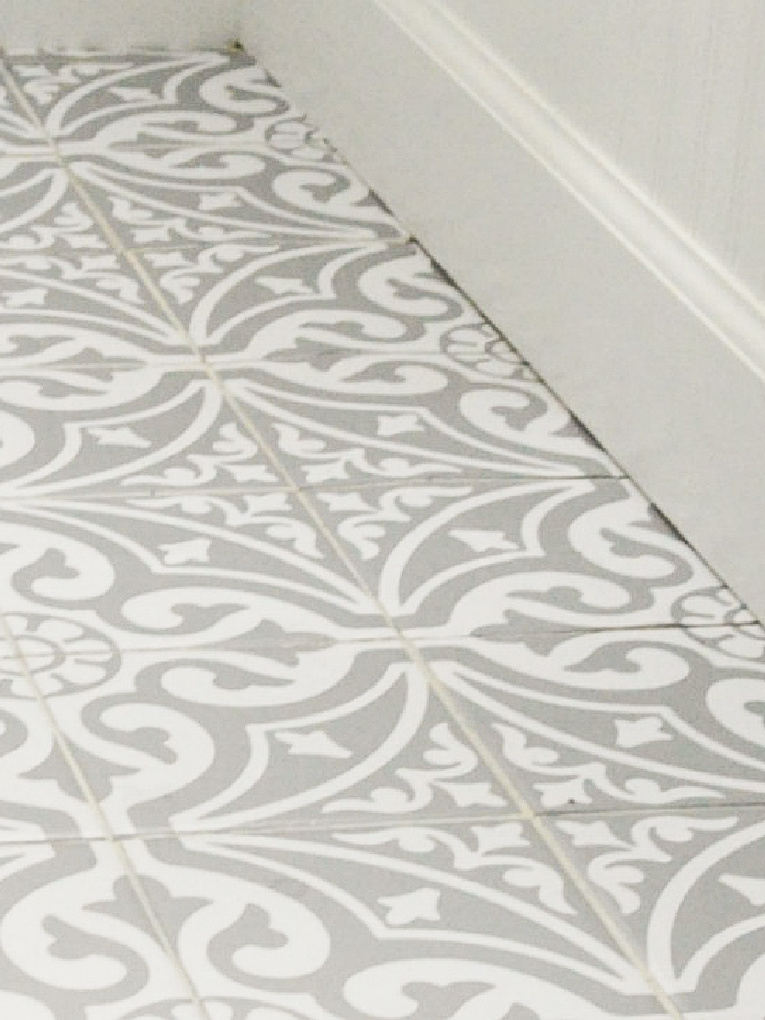
Did you have to pull up your base boards before
You payed your tile?
My baseboard was tile so we decided to replace the baseboard. We replaced the baseboard first and then we put the stickers on the tile. I hope this is helpful to you!
Thanks for the tip about using a knife to cut floor decals in order to get cleaner results. I’m thinking about getting a bathroom remodel soon since I need a lot of repairs anyway due to a recent plumbing problem. After that, decorating with floor decals will probably help in creating a spa-like atmosphere that I’m trying to go for.
This turned out great and it is wonderful to know that it stands to normal wear and tear.
They look great! Good to know they hold up so well!
I have never seen these tile stickers and am super impressed with the end result of this project. It’s great that 3 years later they still look new.
What a great alternative and your transformation looks beautiful!
I have never heard of this before. This still looks amazing and so great for the budget.
Many can’t afford want to d eal with the mess of getting dated tile removed.
What a transformation! This gives me inspiration for my stairs.
I had no idea there was even a product like this out there. They have really held up well. I think this is the perfect project to update a half bath.
This is such a practical way to ‘remodel’ a tile floor! It really looks amazing! Pinned
Wow! I am so impressed with how this turned out. What a great and affordable way to totally re-do a space!
It looks amazing, Lynn! And the pattern is beautiful!
Great job – Love when you can find wonderful products to do a makeover.
super idea for my daughter’s bathroom until she can afford total renovation in more than a few years! Thanks.
Love to hear about your experience with peel and stick tiles! The pattern looks so fresh and bright,
Wow Lynne! These look amazing! And I can’t believe how well they’ve held up – what a great DIY update!
Thank you so much for your kind comment, Janet! I was just talking to a friend about these today. They lasted much longer than I expected them to. It was such an easy and inexpensive solution! I hope you find this helpful!
I may have to try to in my laundry room. Your floors turned out awesome.
Can you add grout to make tile more durable
I am not sure. I was able to just update the look of the tile with the tile stickers.
It looks fantastic! I’m considering doing the same in my half bathroom. Can you tell me the color of the grout renew product you used?
Thanks so much, Linda! I used the grout renew product in Alabaster. I hope it helps you. Please reach out if you have any other questions. 🙂
This article on updating floors with tile stickers is incredibly helpful. It breaks down the process in simple steps, making it easy for anyone to follow. The visuals are clear, aiding understanding. I successfully transformed my floor with confidence using this guide. Highly recommend for a quick and cost-effective upgrade!
I recently renovated my kitchen and was looking for a way to update the floor without installing new tile. I came across this post and was intrigued by the idea of using tile stickers. I decided to give it a try and I’m so glad I did! The result is a beautiful and modern-looking floor that looks like new. I love how easy it was to apply the stickers and the fact that they’re removable makes me feel more comfortable with the decision. Definitely worth trying out!
Yay! I am so happy that this worked so well for you! Thank you so much for sharing!
What a fantastic idea to use tile stickers for an easy update! Your post makes the process look so simple and the results are stunning. It’s such a budget-friendly way to transform a space. Thanks for sharing this creative and practical solution!
I love the idea of using tile stickers to refresh my floors! It seems like a fun and budget-friendly way to spruce up my space. I can’t wait to try out the tips you’ve shared. Thanks for the inspiration!
Thank you for this awesome post! The peel-and-stick tile stickers are such a simple, budget-friendly way to update a space. I especially loved the tip on ensuring a smooth application—it made the process seem so much easier. Appreciate the helpful info!