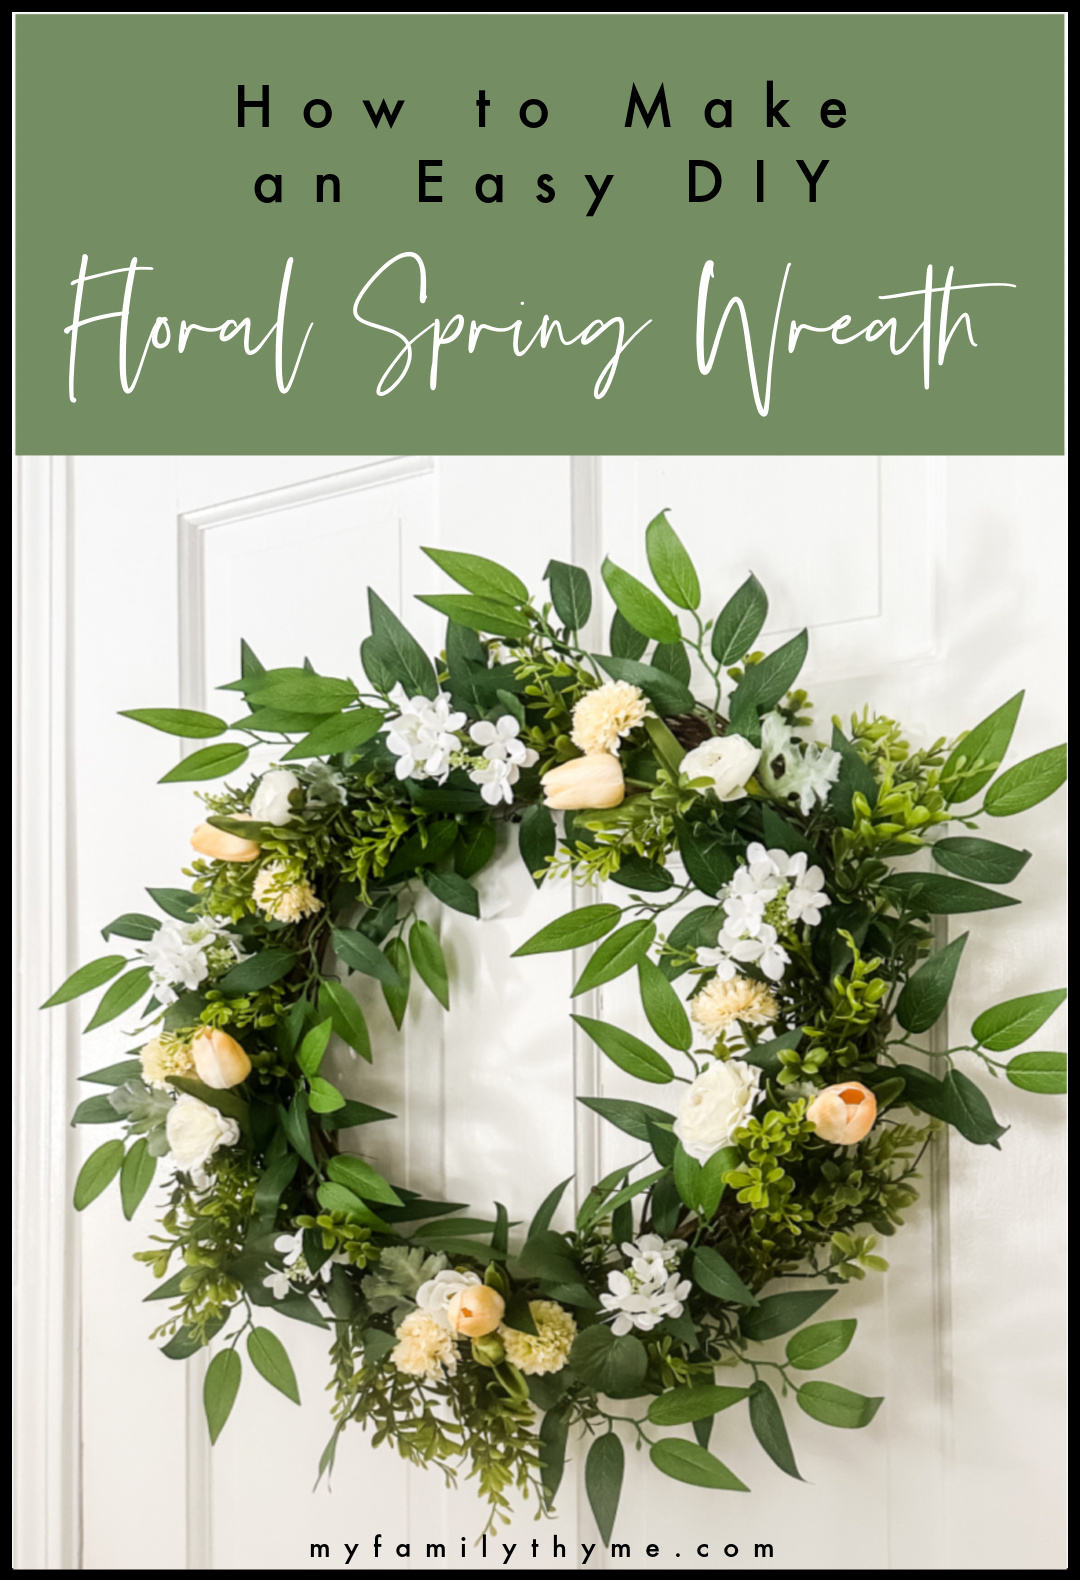
How to Make an Easy DIY Floral Spring Wreath
Add a pop of spring color to your home with this easy DIY floral spring wreath. Learn how to make a beautiful, full floral spring wreath with basic craft store supplies.
This post contains affiliate links. Please see my disclosure policy here. Thank you for your support.
How to Make an Easy DIY Floral Spring Wreath
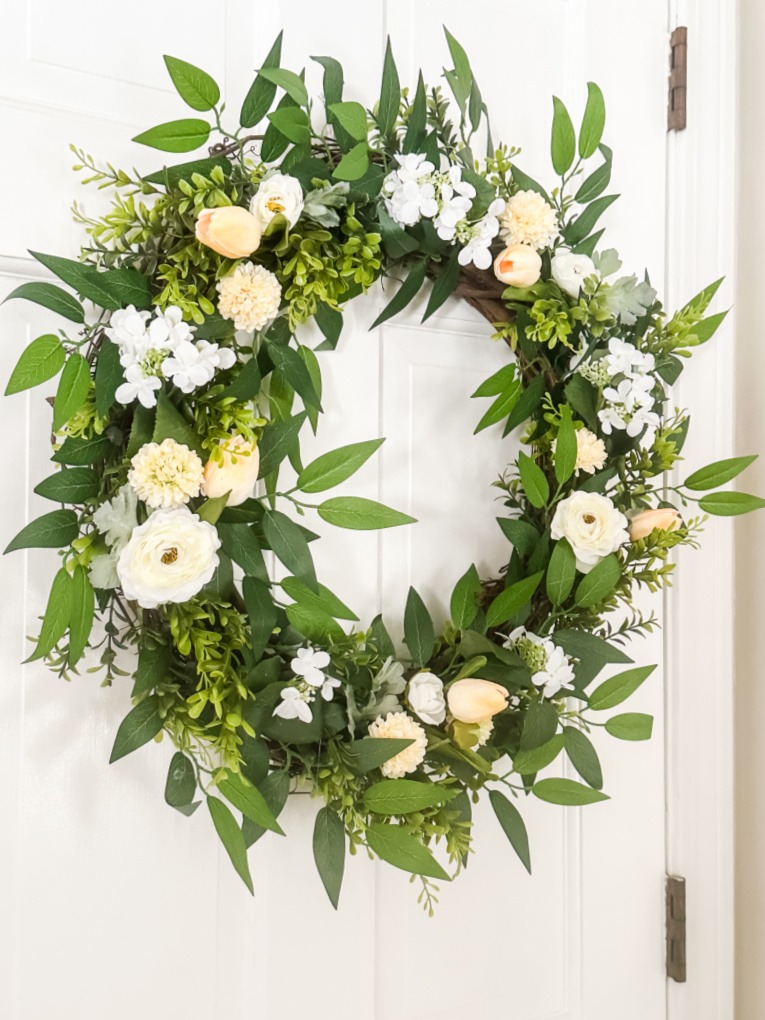
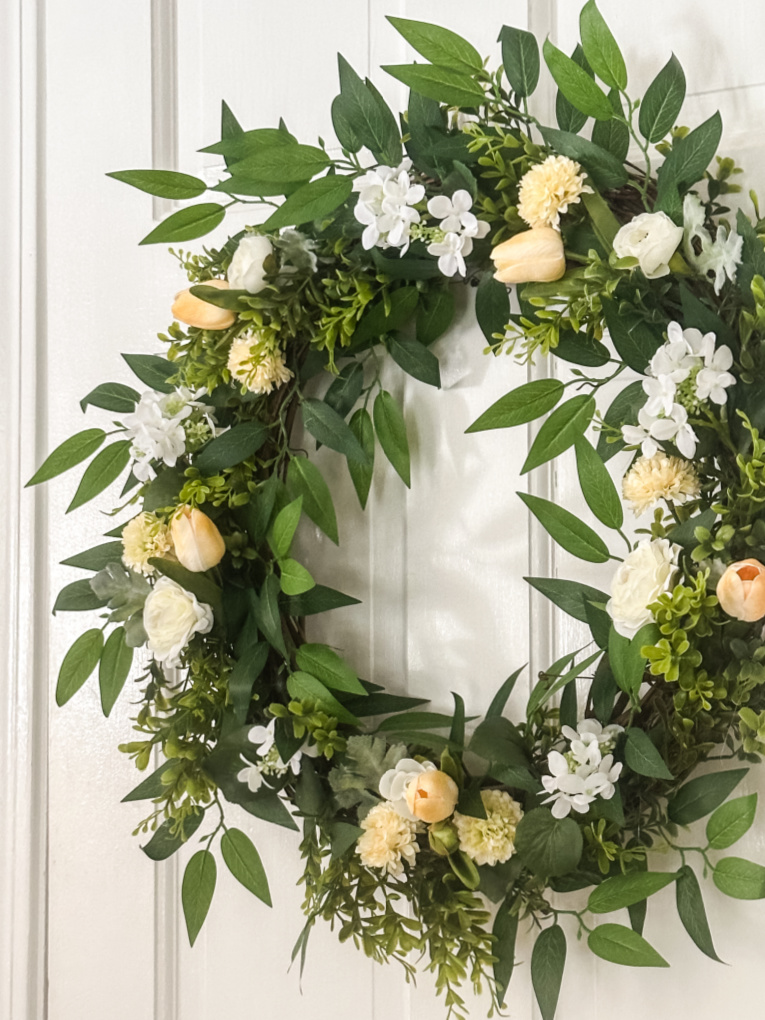
Spring is less than a month away and it’s the time of year when I am craving color and greenery in my home. So it is the perfect time to make a wreath. Nothing says welcome to a new season like a beautiful wreath! This wreath that I am sharing today is a combination of my Simple Spring Floral Wreath and my Spring Tulip Wreath. I hope you enjoy it and give it a try!
What kind of flowers can you put on a spring wreath?
Some kinds of flowers that bloom in the spring and would be beautiful on a spring wreath are:
- forsythia
- lilacs
- tulips
- daffodils
- ranunculus
- cherry blossoms
- peonies
- hyacinth
- crocus
- snowdrops
- pansies

Materials Needed for this DIY Floral Spring Wreath
To make this floral spring wreath, you will need:
- 18 inch grapevine wreath
- boxwood garland
- Italian ruscus greenery stems
- hydrangea branch stem
- yellow pom pom stem
- ranunculus stems
- yellow tulips (I purchased mine at the Target Dollar Spot, but you can find similar light yellow tulips here.)
You will also need the following supplies:
- clear zip ties
- wire cutters
- Gorilla® Dual Temp Full Size Hot Glue Gun
- Gorilla® Full Size Hot Glue Sticks
Shop the Post


How do you make a floral wreath?
Follow this step by step tutorial to create your own floral spring wreath. For this wreath, I followed a similar process that I used to make my Floral Summer Wreath and Simple Fall Wreath.
Easy Step by Step Wreath Assembly:
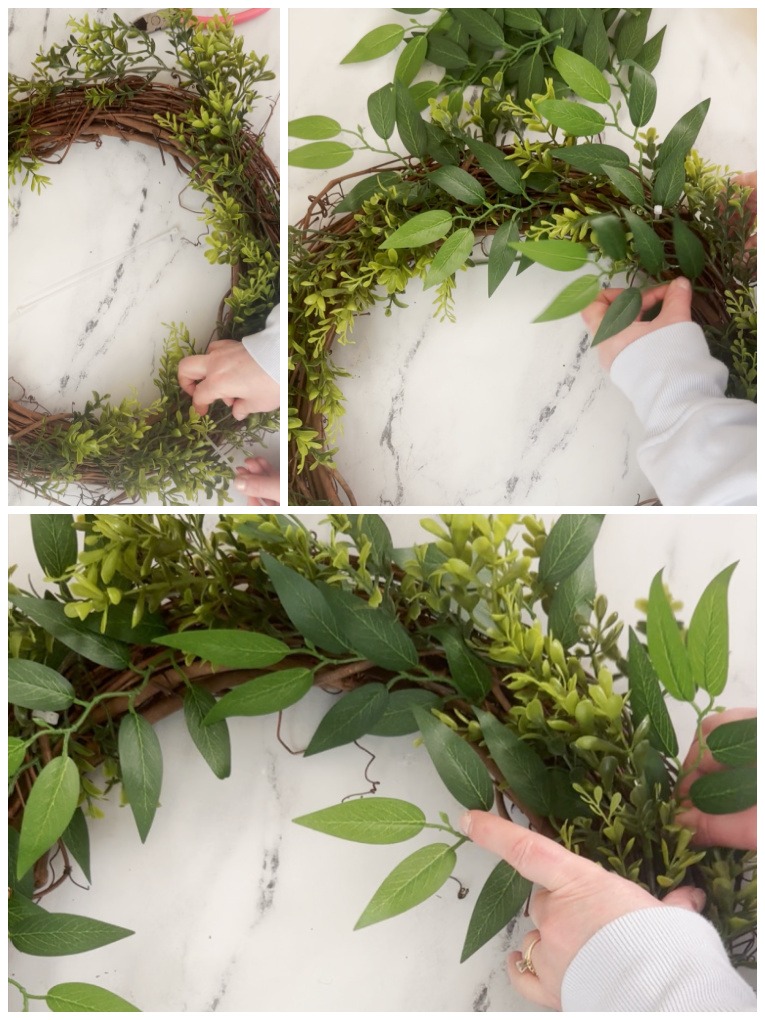
- Lay your garland on top of the grapevine wreath. Then, using zip ties, attach the garland to a piece of the grapevine. Pull the zip tie tight to secure the garland. Clip off any excess piece of the zip tie.
- Using the wire cutters, cut apart the Italian ruscus greenery stems. Tuck them on the sides of the wreath, alternating inside and outside.
- When you are happy with the placement of the stems, add some hot glue to each stem. BE VERY CAREFUL when using hot glue! I highly recommend using these hot glue finger protectors. You may also want to use a popsicle stick to tuck and press the stems into the wreath.
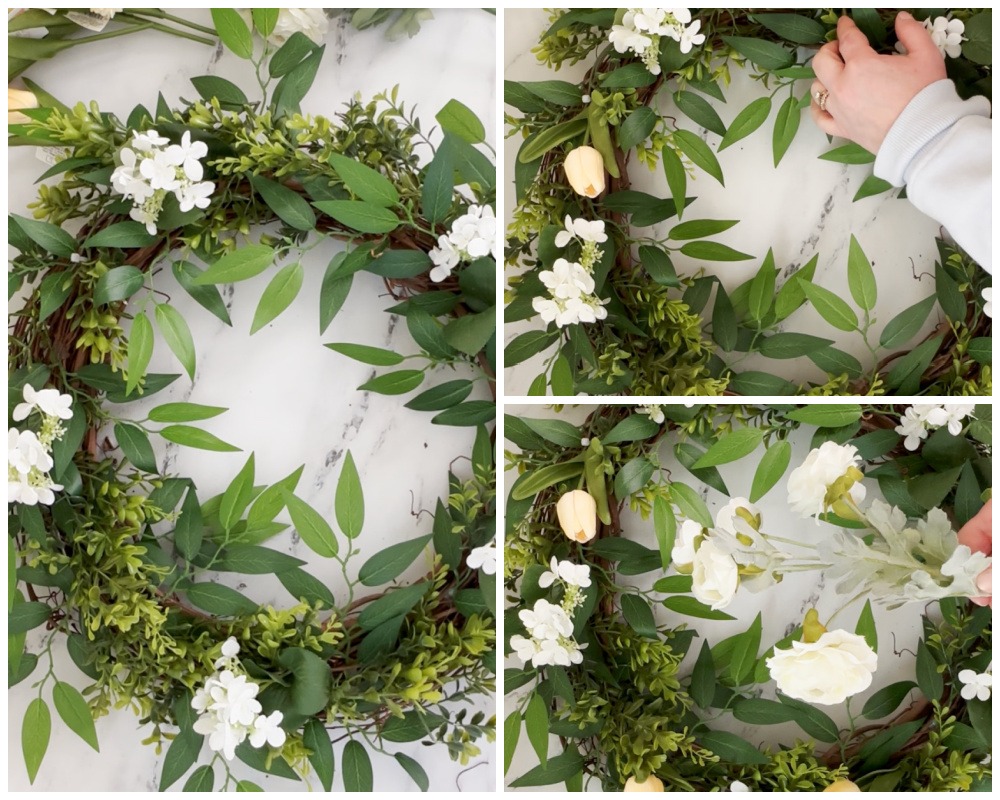
- Next cut apart the hydrangea branch, leaving a couple of inches of each stem. Arrange the hydrangeas on the wreath. Repeat the process to hot glue the hydrangea stems.
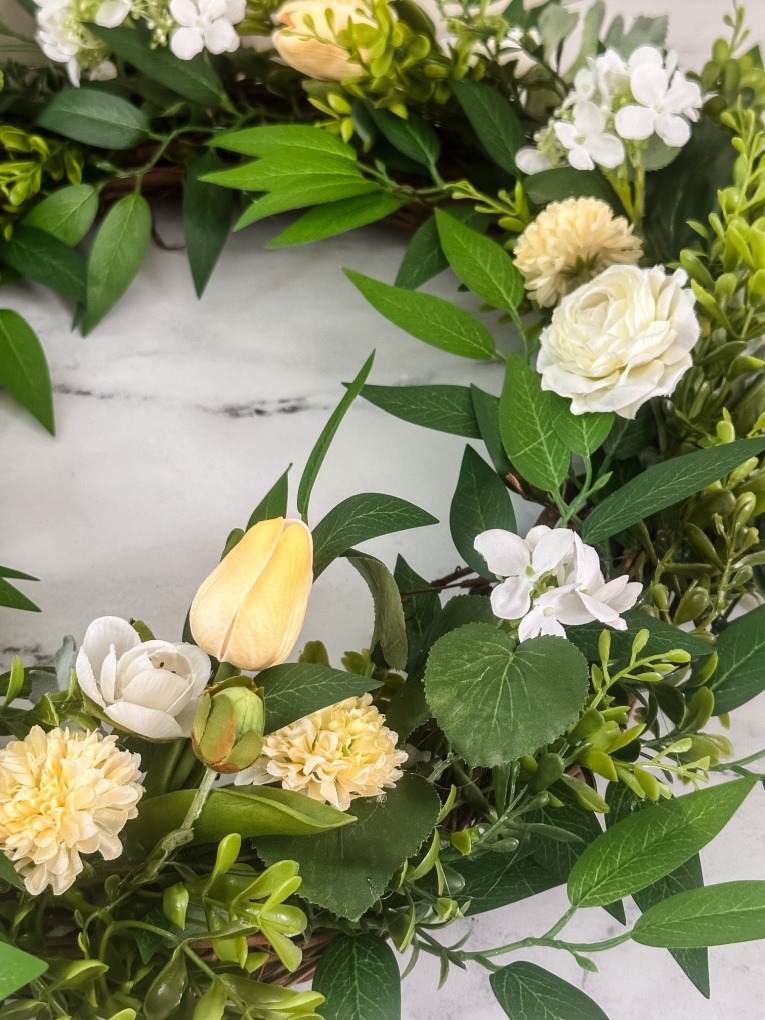
- Repeat the process for adding the tulips, ranunculus, and pom pom stems.
- When finished, make a hanger using twine or ribbon. Attach it to the back of the wreath.
- Hang and Enjoy!
Wreath Making Tips
- Before you begin, prepare your grapevine wreath by snipping off any excess pieces of grapevine.
- I highly recommend using these hot glue finger protectors.
- You may also want to use a popsicle stick to tuck and press the stems into the wreath.
Where can I hang my wreath?
Display your floral spring wreath any place where you would like a pop of spring color. Enjoy it on an entry door to welcome guests or on an interior door or wall for instant seasonal decor. I love hanging wreaths on windows and mirrors too!
Please let me know in the comments if you make this floral spring wreath! If you post it, please tag me. I would love to see your beautiful creations!
Thank you so much for visiting today. I would love to connect with you on Facebook, Instagram, Pinterest, or here on the blog!

It’s wicked pretty, Lynne!!!!
This wreath is so fresh and pretty Lynne! Pinned!
Hi Lynne – I love how this wreath turned out. The loose foliage lends such a comforting and relaxed feel. The flowers you selected are perfect. Wishing you a wonderful week!
Your wreath is absolutely gorgeous, Lynne. I love the combination of the pretty white and yellow flowers. I am excited to be featuring it in my weekly recap post today.
Thank you so much, Jen!! I appreciate your kind words and feature! Hope you’re enjoying a wonderful weekend! xo