How to Make Christmas Ornament Reverse Canvas and a GIVEAWAY!
Follow this simple tutorial to make a beautiful framed DIY Christmas Ornament Reverse Canvas. Use an inexpensive canvas to make this holiday wall decor!
This post contains affiliate links. If you make a purchase after clicking my links, I will receive a small commission at no additional cost to you.
I love summertime.
I love the carefree days with warm weather and colorful flowers.
I love making and canning homemade blueberry jam, as well as spending time on my coastal inspired porch.
But I have to confess that I am already thinking ahead and getting excited for Christmas!
It’s less than six months away. Just thinking about the upcoming holiday season makes me smile. I love everything about the Christmas season…especially the crafting, decorating, and gift giving!
So this week here on My Family Thyme, we’re going to be celebrating Christmas in July!
What better way to celebrate Christmas in July than with a wonderful GIVEAWAY!
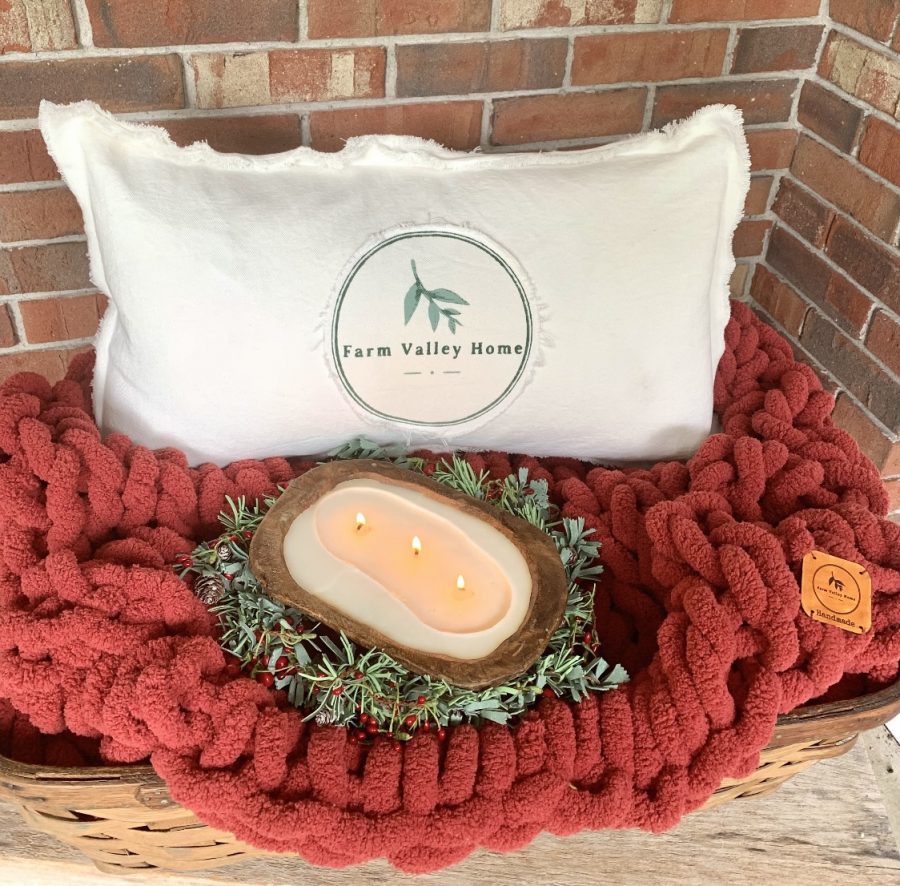
I am so excited to be collaborating with my talented friend Val from Farm Valley Home to bring you an amazing giveaway. She makes the most amazing chunky knit blankets and curates beautiful home decor items for her shop.
Before I share the details of the giveaway…let’s do a little crafting.
How about a reverse canvas?
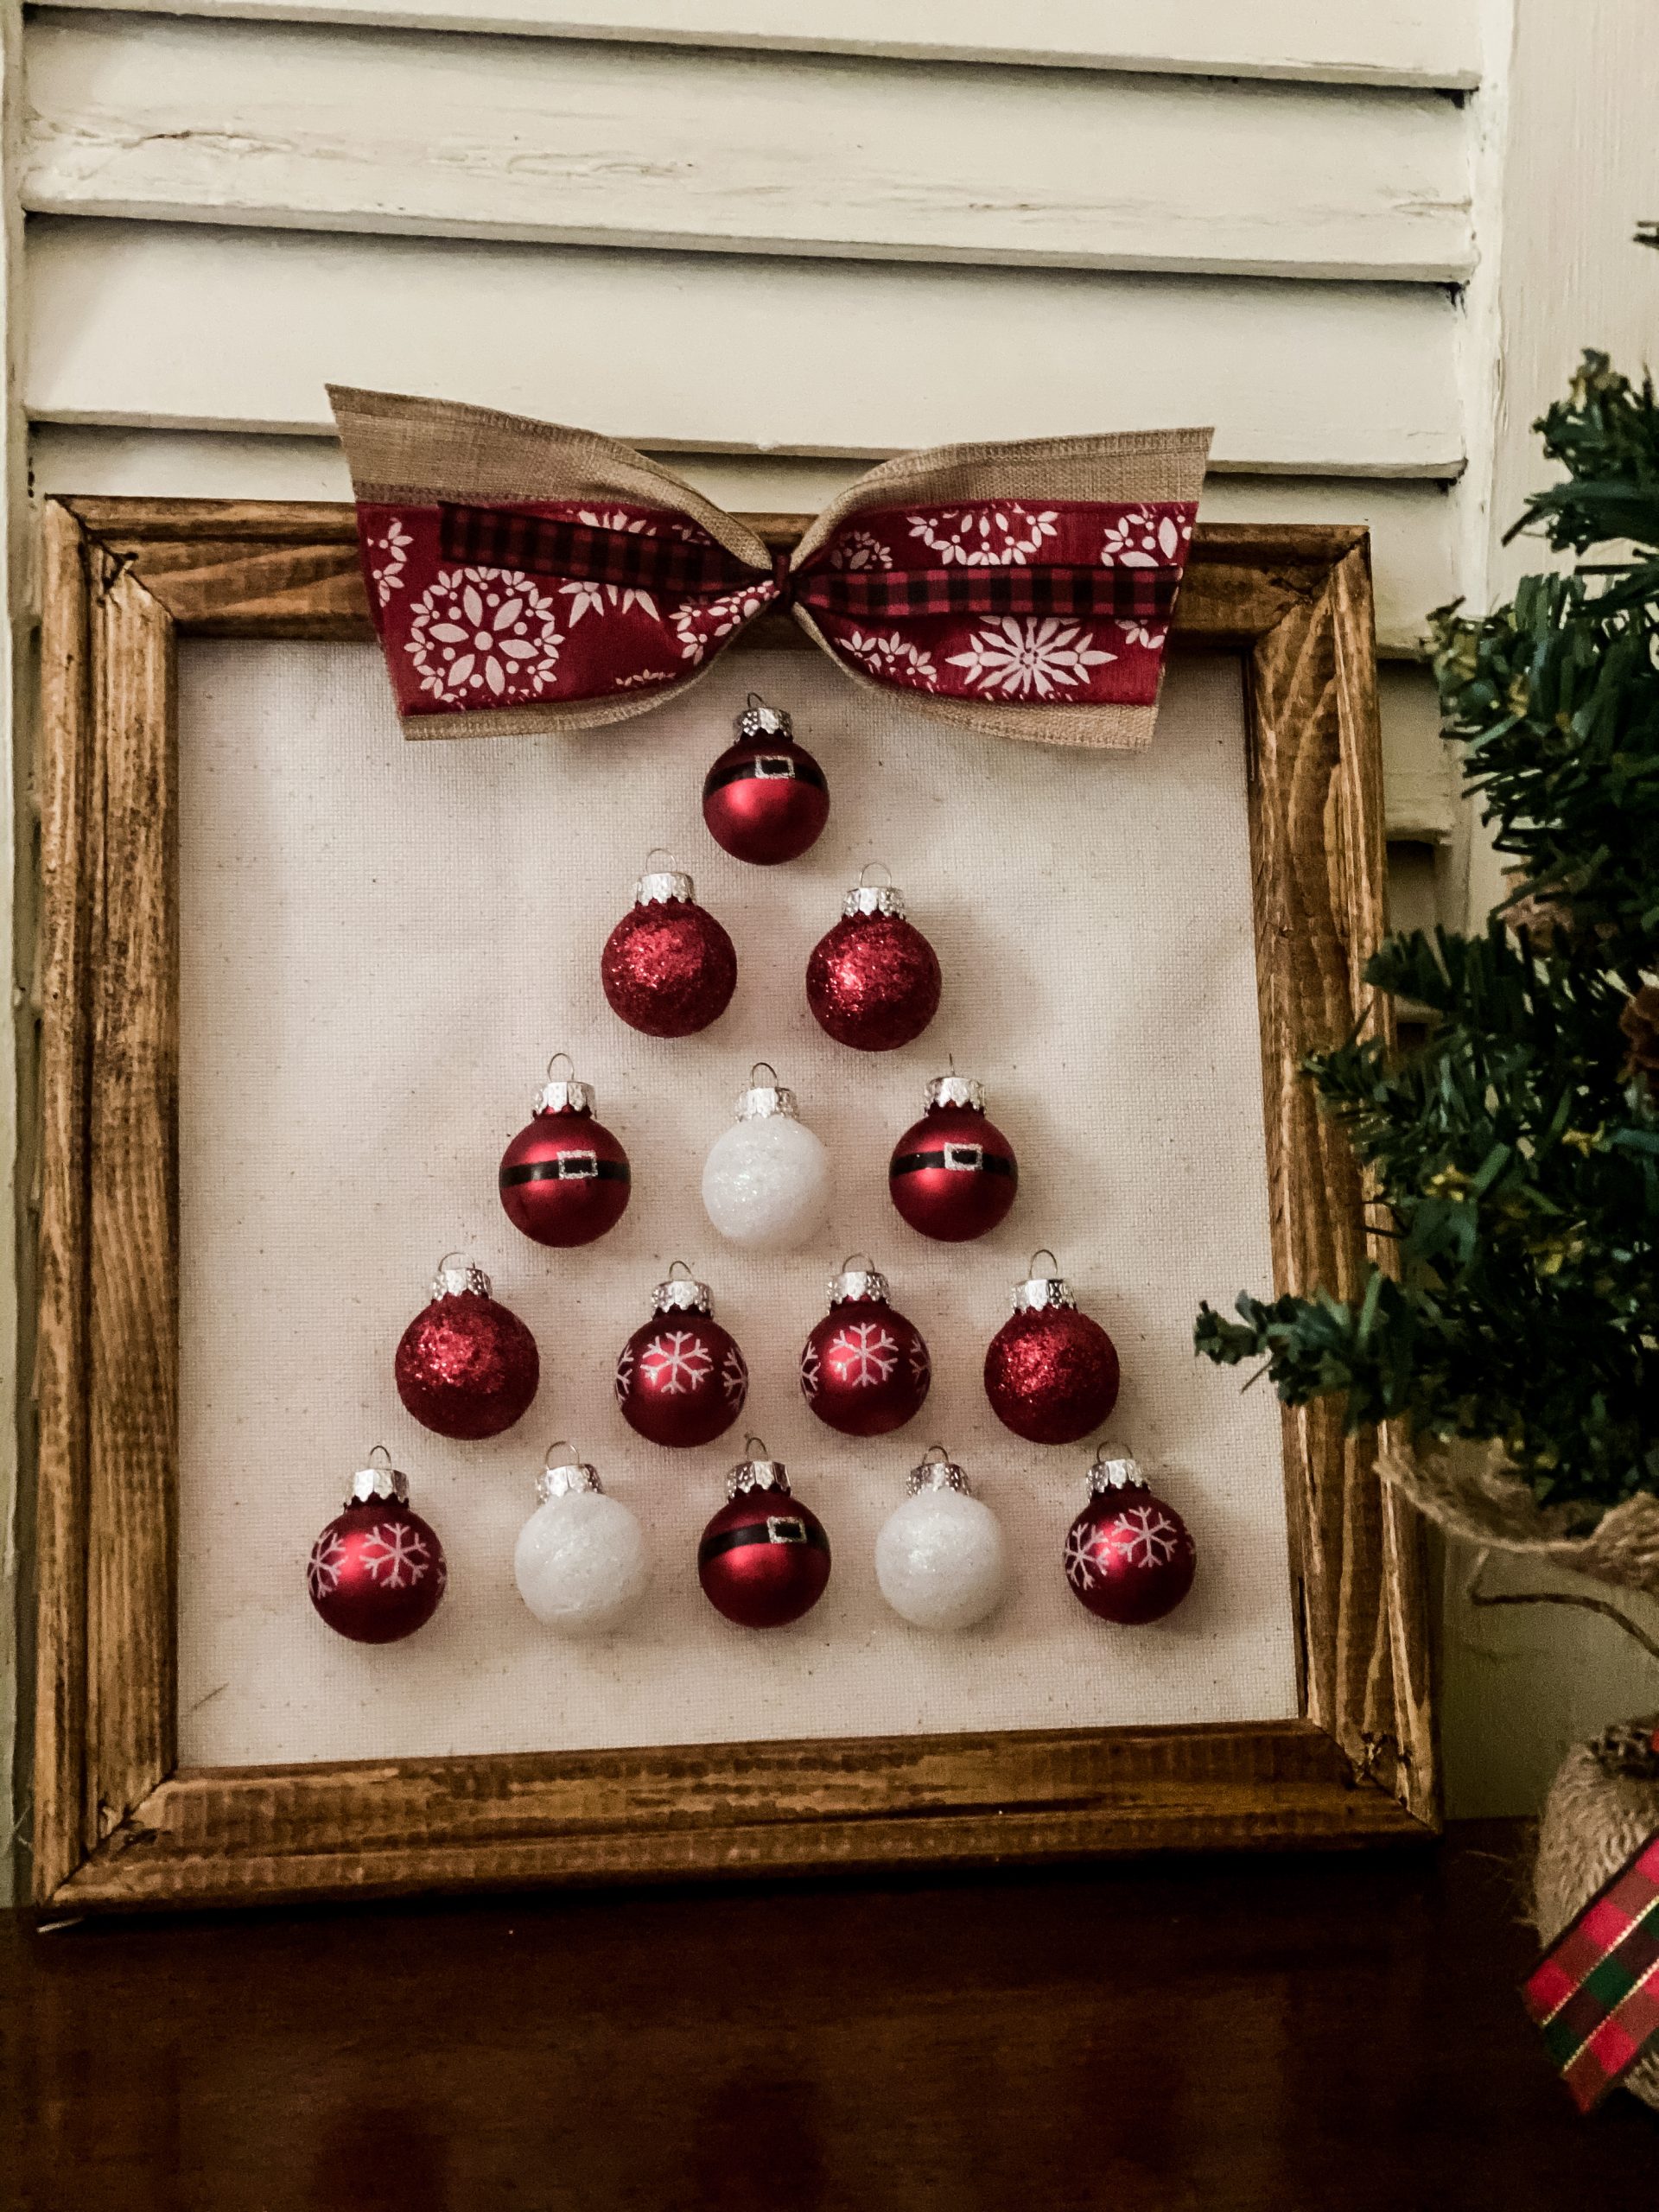
Made from an inexpensive canvas and some sweet mini ornaments, this cute Christmas craft will make a great gift.
Or you use it for holiday decor.
It’s so easy to make, why not make more than one?
Materials needed to make Christmas Ornament Reverse Canvas:
- canvas (I had purchased this multipack of 10 inch by 10 inch canvases from Michaels.)
- glue gun and glue sticks
- utility knife
- scissors
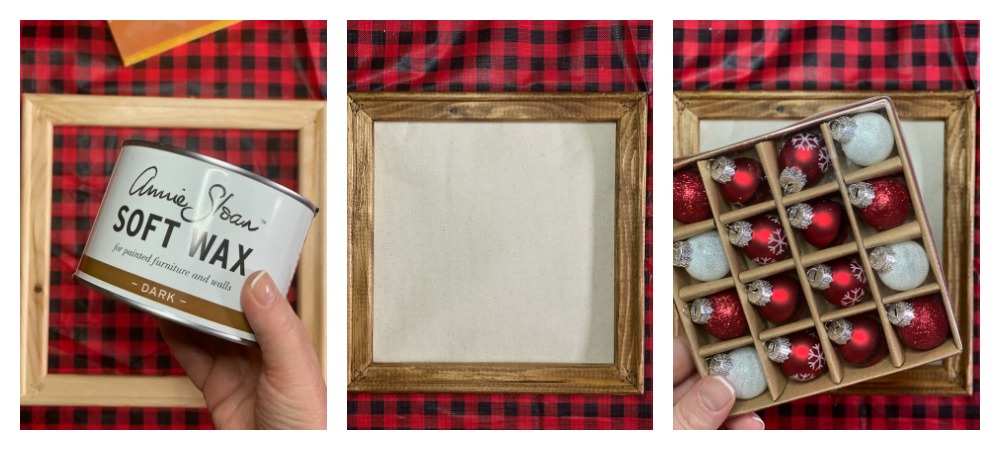
- stain or dark wax (I used Annie Sloan’s Dark Wax)
- sponge brush
- paper towel or rag
- mini ornaments (I had purchased mine at Walmart. I found some similar cute and inexpensive mini ornaments. You can see more both here and here!
- three pieces of ribbon of different widths, in coordinating patterns
Directions to make a Christmas Ornament Reverse Canvas:
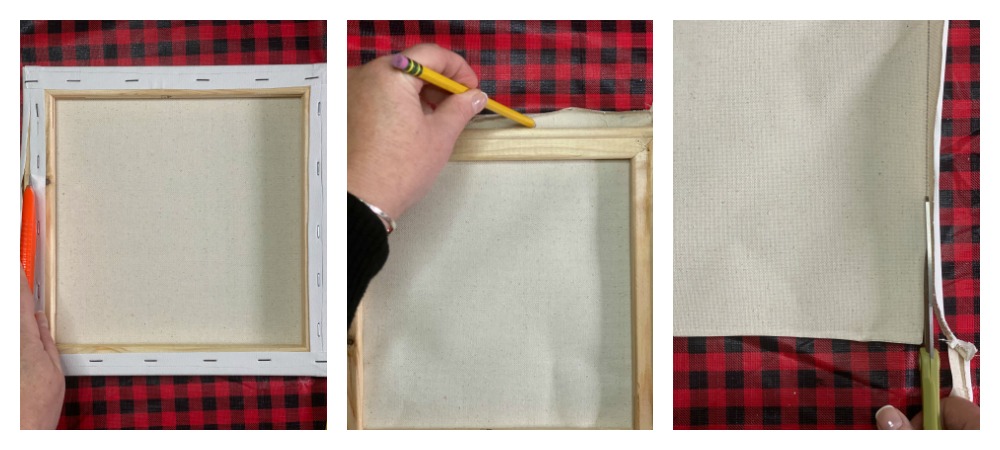
- Turn your canvas so that the back is facing you. Carefully use your utility knife to cut the canvas and
remove the canvas from the wood frame it is wrapped around.
- Paint, stain, or wax the frame. (I used Annie Sloan’s Dark Wax.)
- Trace the canvas around the outside of the frame. Trim the canvas inside of the traced line so that it fits on the back of the frame.
- Carefully use your glue gun to glue the canvas to the back of the frame. Attach it so the natural colored side is facing the front and the white side is facing the back.
- Arrange the ornaments in the shape of a tree (or perhaps a wreath, or an initial!)
- Using your glue gun, glue the ornaments into place.
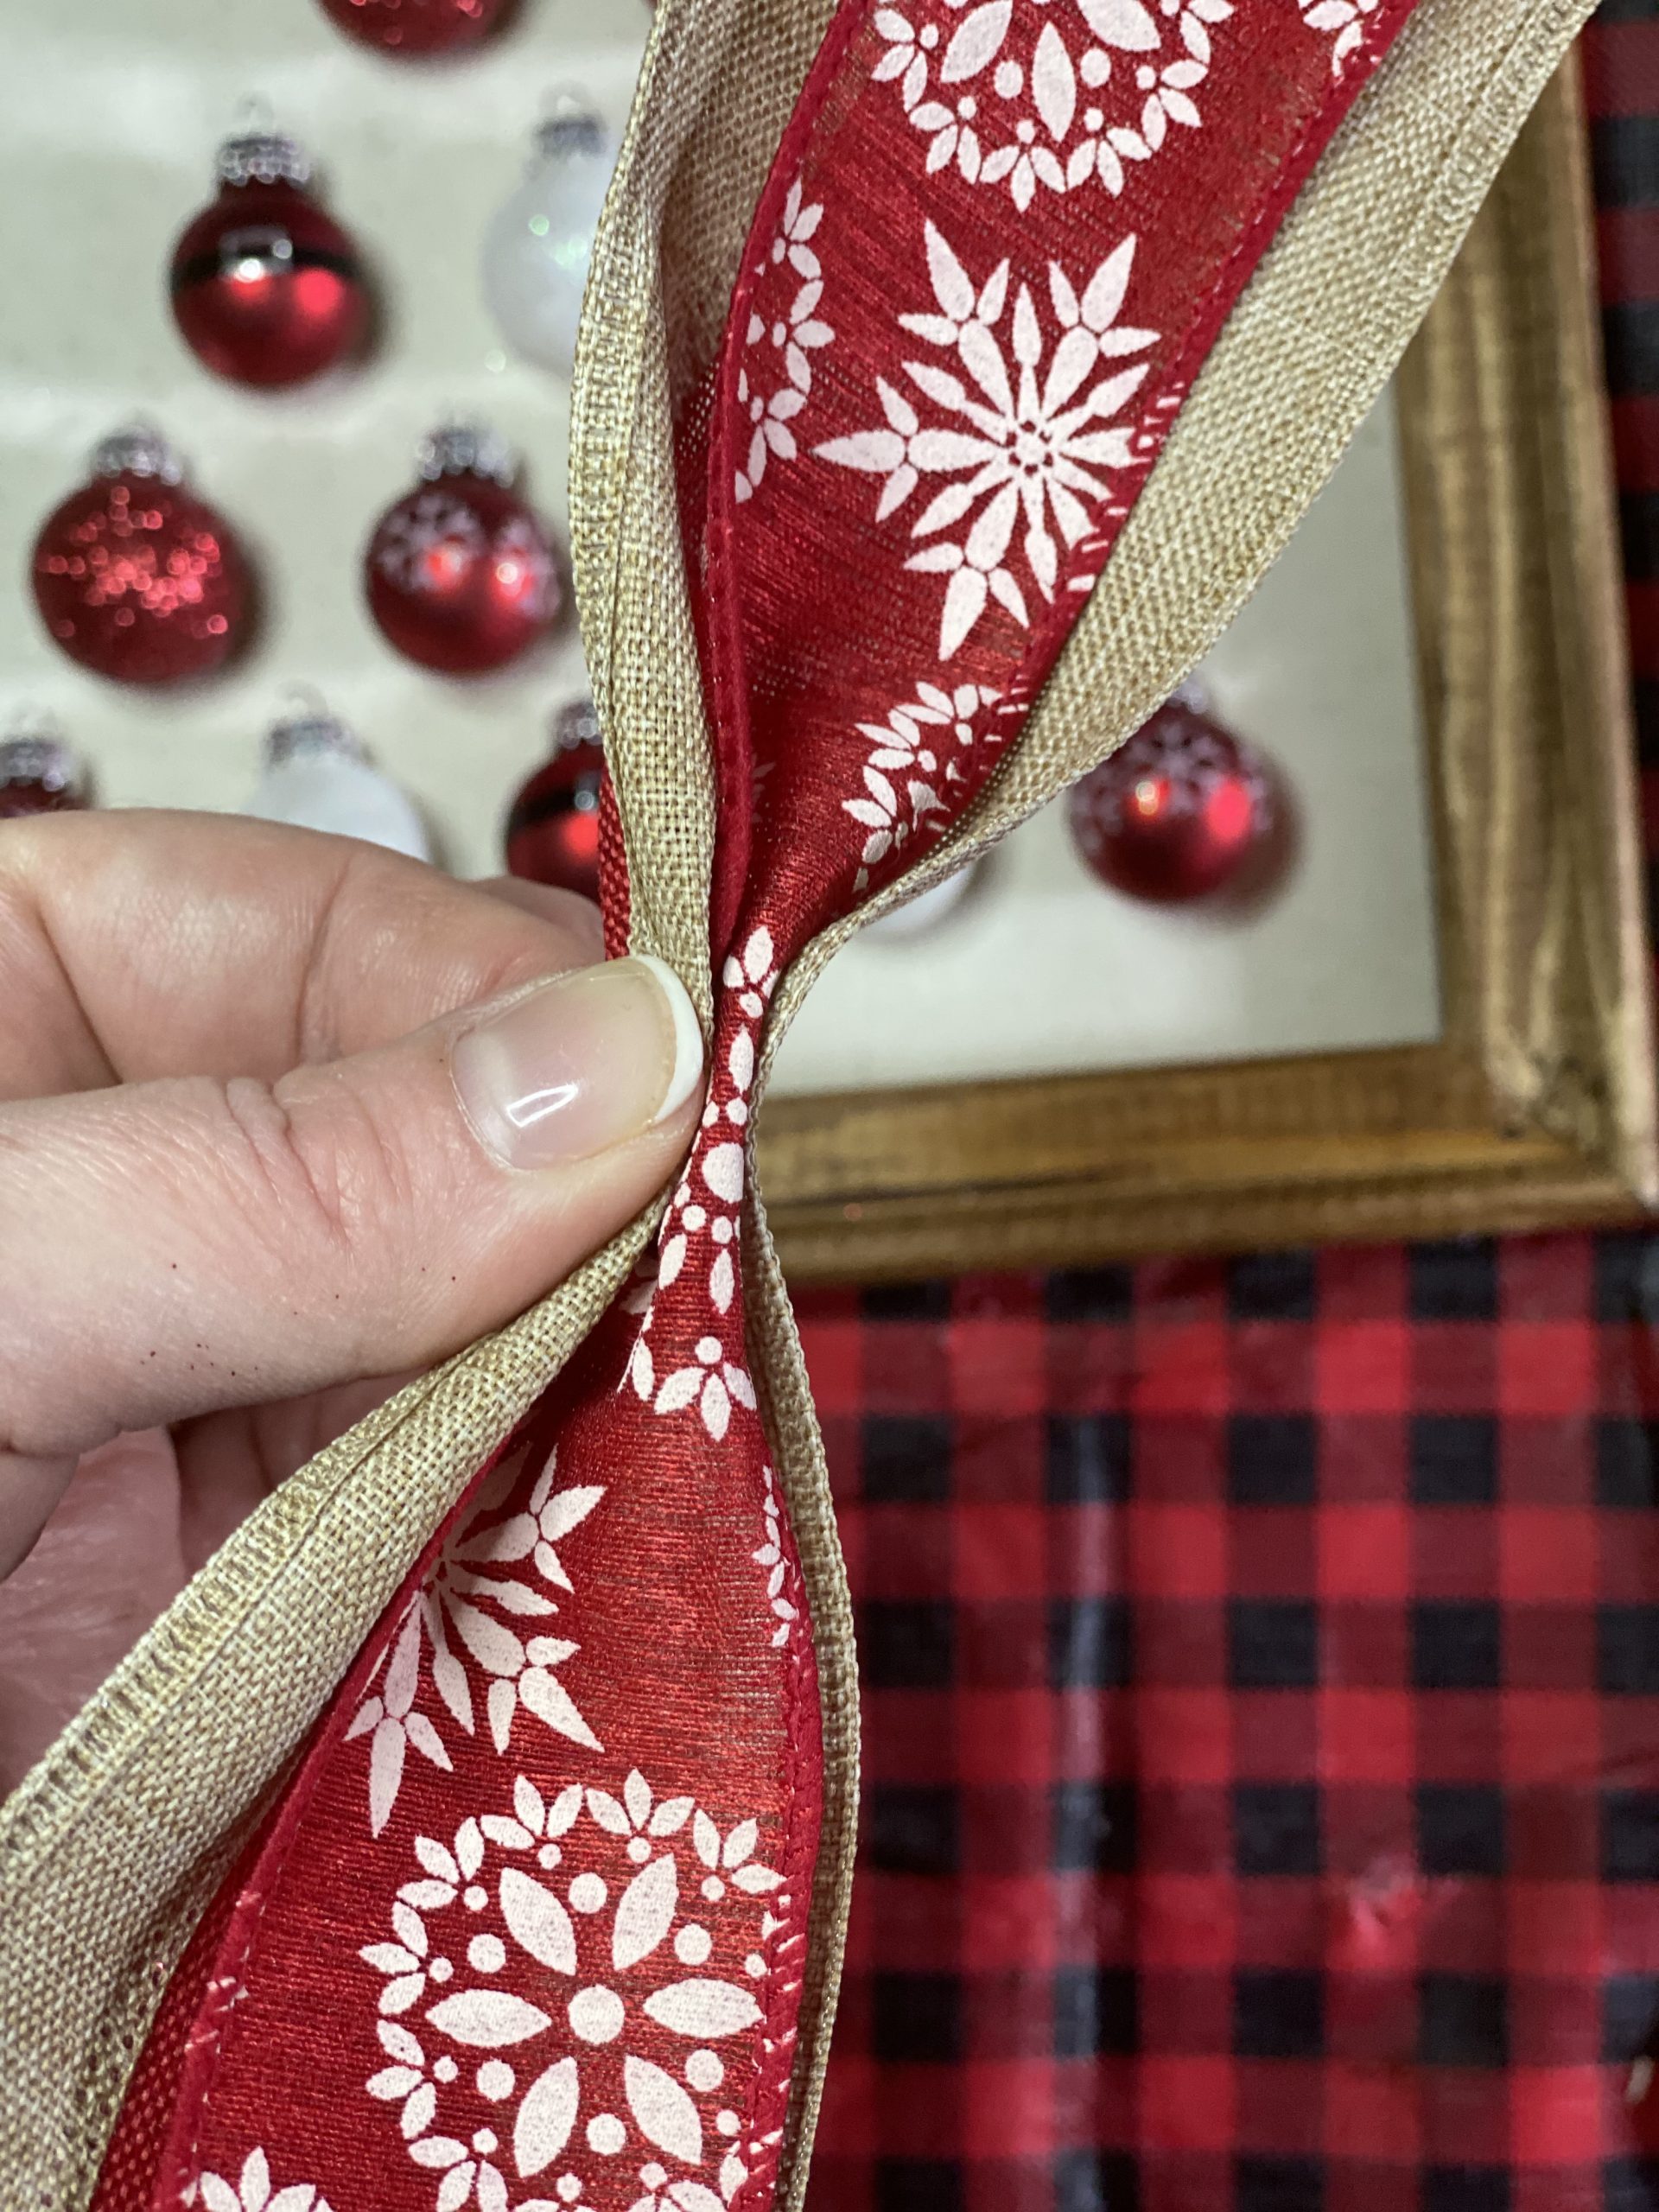
- To make a bow, take your three pieces of ribbon and line up the two widest ones.
- Gather or pinch the ribbon together. Use an over, under pattern and then tie with the thinnest ribbon.
- Trim your bow to your desired length and glue it to the frame.
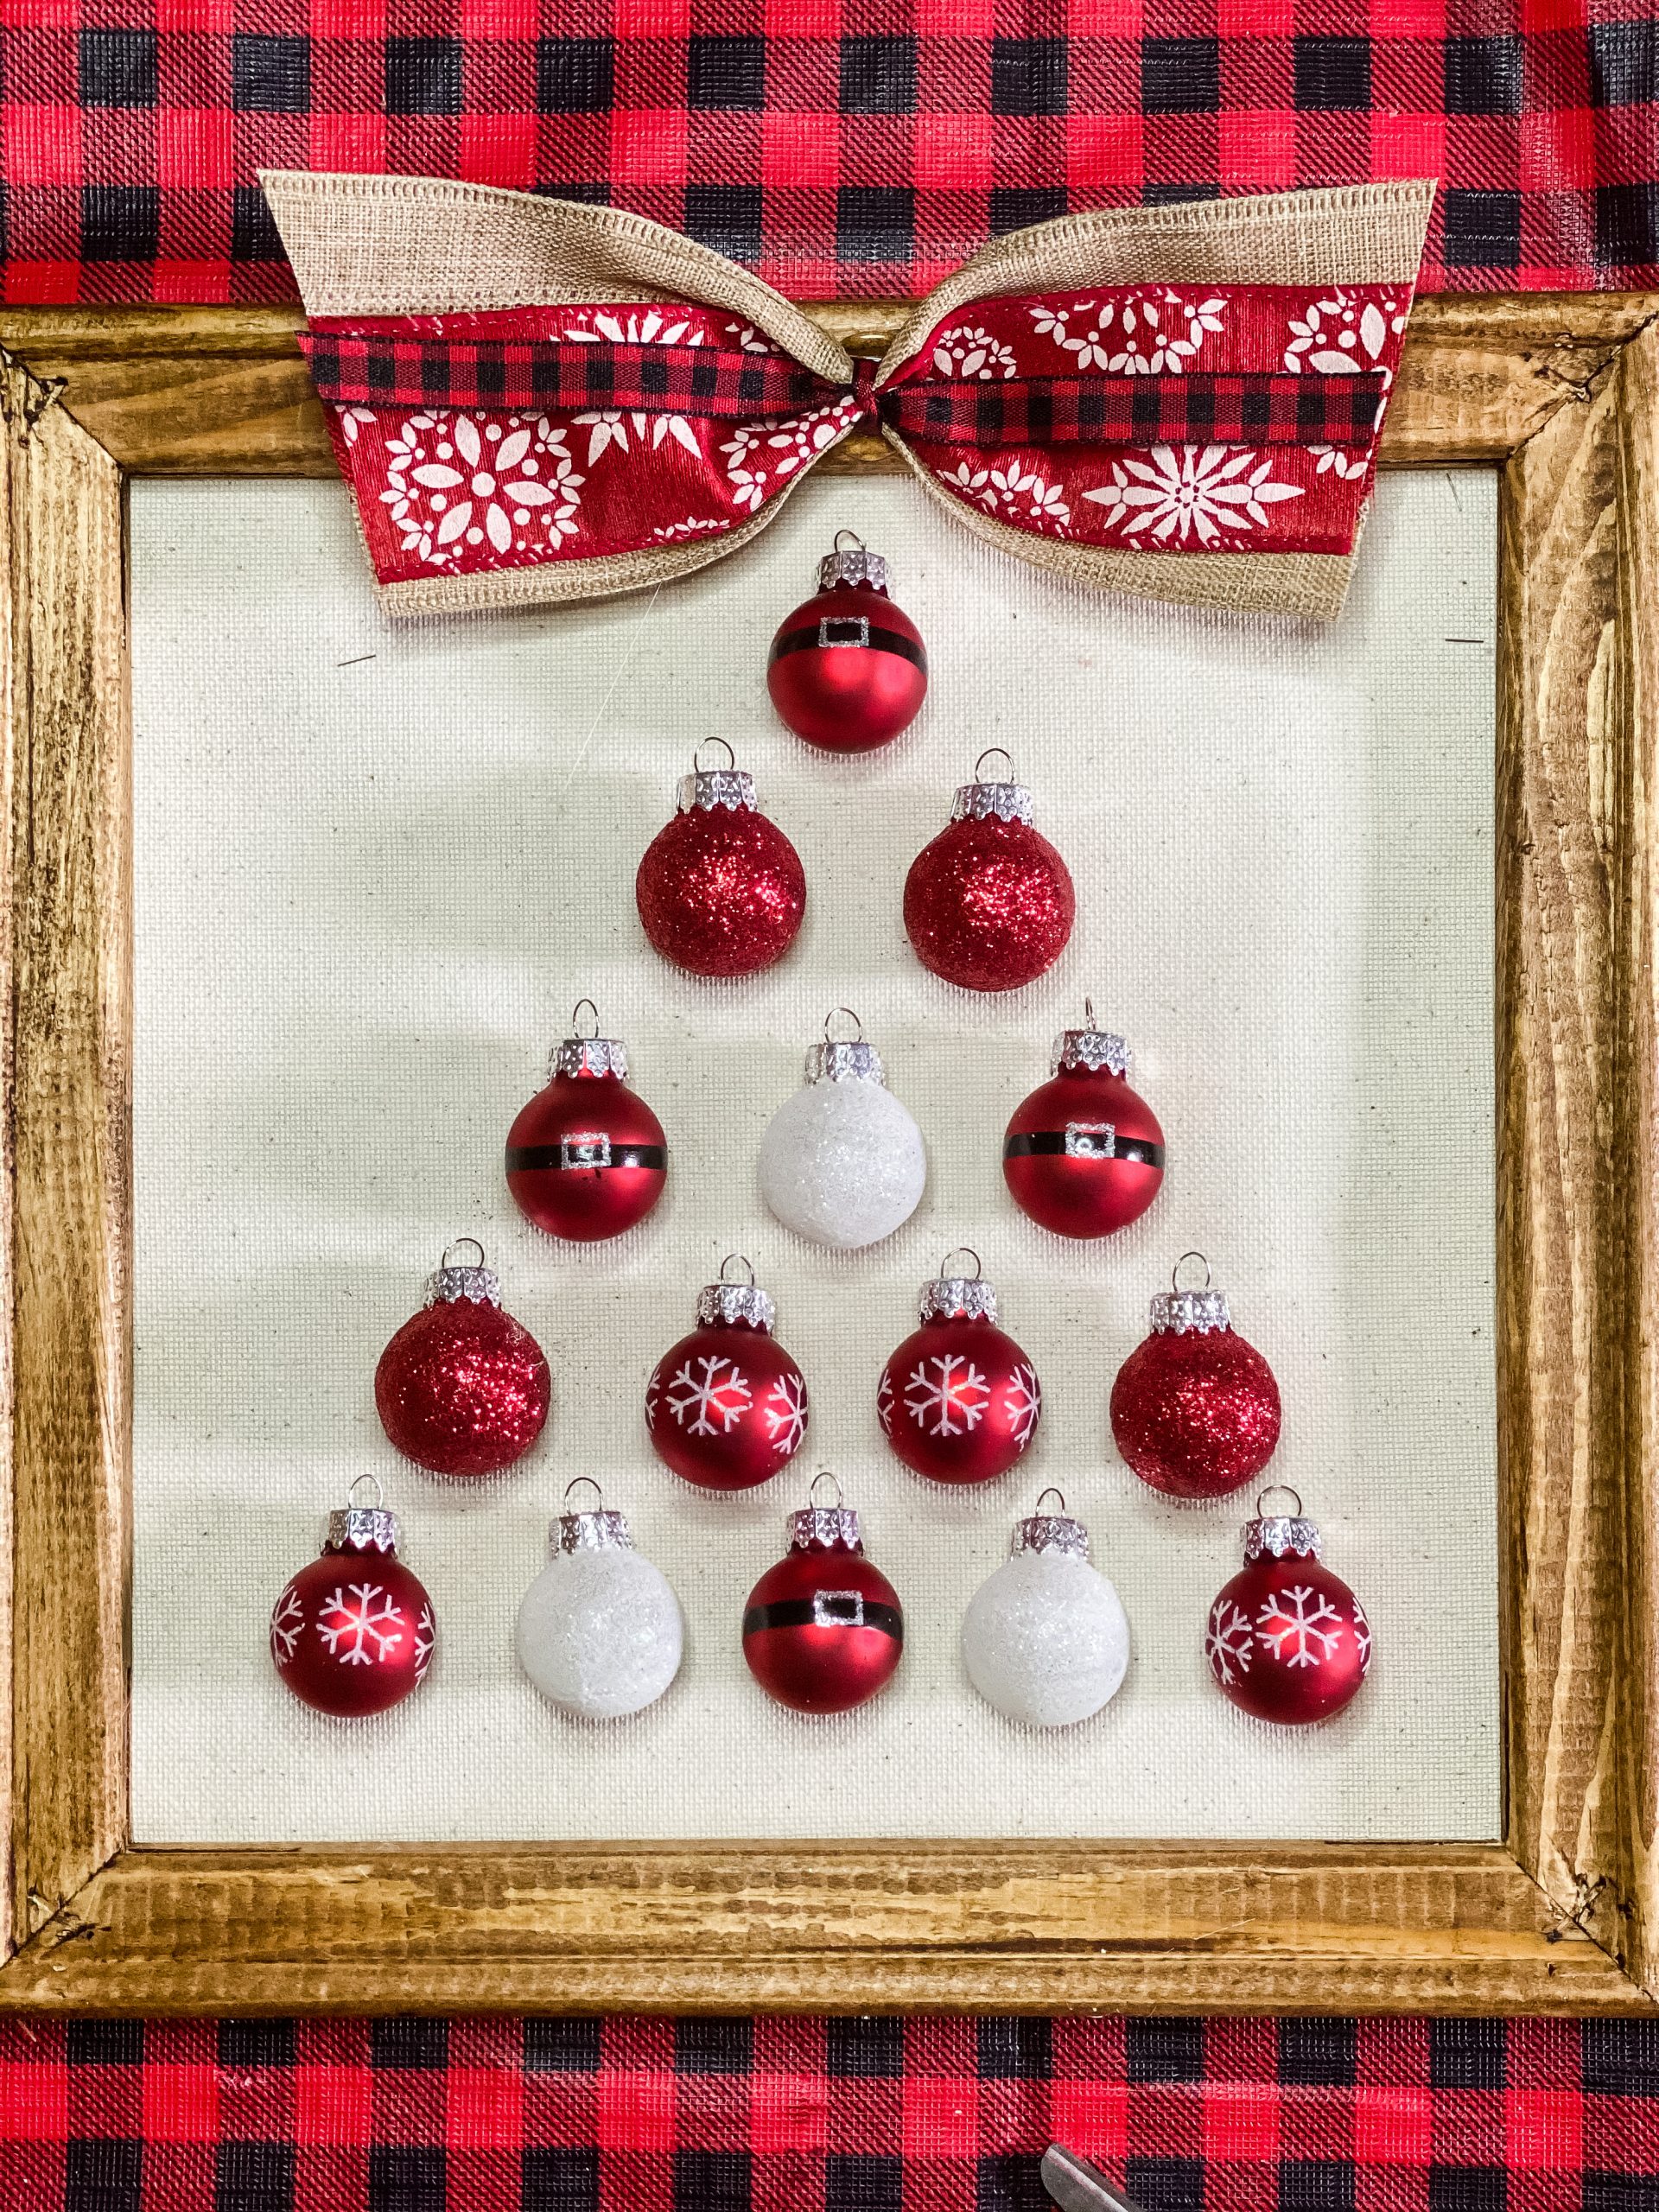
This DIY Christmas Ornament Reverse Canvas is such a cute and easy craft! It is so affordable too! This project cost only about $5 each to make. Wouldn’t this make a great holiday decoration or gift?
Now for our GIVEAWAY!
To say thank you for following along and to celebrate Christmas in July, my friend Val from Farm Valley Home and I are having a giveaway! One lucky winner will receive a beautiful, handmade chunky blanket, a Christmas dough bowl candle and a $25 Target Gift Card!
The winner will be selected and contacted on Sunday, July 25, 2021.
Adorable Lynne! Your Santa-belt ornaments are the star of your ornament Christmas tree! Happy to be hopping with you again. ♥
Wow, this is awesome, Lynne! I had never heard of reverse canvas before. I love this technique! And it seems easy, too, with wonderful results! Thanks for sharing!
I was thinking this was a reverse stencil painting! So it took me a minute to figure out what you were doing. Interesting idea! I have reversed a canvas before, simply to use the other side because I didn’t like the design on the front!
I am in Karianne’s blogging mastermind group, but not the group you mentioned so it’s neat to see one of the projects!
Awesome project Lynne! I can’t wait to get started on x-mas crafting too. BTW, love the french manicure too 🙂
Lynne, this is adorable! Pinned! I have everything at home to make one of these reverse pictures. My canvas is burlap, but should work.
Now, where did I store that canvas……….
Hugs,
Rachelle
Very cute. I love the ribbons all of them. Where did you find those? Thanks so much for sharing. It’s a great idea for my niece who can’t fit a tree.
Lynne I am so ready to get my Christmas DIYs ready. I love your ornament frame piece. Looks great and very easy to make thanks to your tutorial. Love it.
Wow Lynne, this is new to me, and being an artist with a studio full of canvases, I would have never thought of this creative way to use them! Great for painting fails too, just turn the painting over and use the canvas for a cute craft like your ornament tree!! Adorable!! Thanks for sharing!
What a great idea! This is so very cute friend, love it! Thanks for sharing and wonderful hopping with you.
What a darling Christmas project! I am already thinking of Christmas decorating too, so this comes just at the right time.
You are so very creative and the tutorial is great!
Great to hop with you.
Jemma
Lynne, This is such a cute project, and a great little decoration to make to bring a little bit of Christmas anyplace! These would make a great gift, too!
Such a cute idea…and great idea to keep busy for a rainy day
What a fun giveaway, Lynne! I should jump on the Christmas in July bandwagon. I love celebrating the season as long as possible. Also, I adore your Christmas tree craft! It has such great rustic charm.
Love it!
Lynne, love this idea ad the ribbon you used is a gorgeous shade of red too. I love the throw too, gorgeous and perfect for cold winter nights by the fire.
Pinned your project!
I love your adorable canvas! It’s beautiful as home decor for oneself or as a gift! I love the giveaway, too. Fun!
Lynne, this is a super cute idea!!
This is an adorable Christmas craft!!! Thanks so much for sharing. I am pinning so I won’t forget it:)
Lynne, this is adorable. I LOVE the rustic burlap and frame mixed with glitter and snowflakes on the ornaments.
This is so cute! And what a great way to reuse the canvas and the frame! Genius!
Love Christmas in July. Thanks for the ideas.
I love your reverse canvas Christmas project. It’s great that you already have something new to display for Christmas.
What a fun project!! Awesome giveaway too!
I love this, it’s such a pretty Christmas decoration! I never thought of making a bow like that but it’s so easy and looks fabulous! Pinned!
Very pretty! Thanks for getting my Christmas ideas flowing. Love your blog. T
I am pinning this one for later! Love!
Love this reverse canvas idea!
Very good project Lynne! I can’t wait to get started on x-mas crafting too. BTW, love the French manicure too