How to Fix Ceiling Water Stains
Do you have ugly brown water stains on your ceiling? Follow this simple, step by step tutorial for how to easily and permanently fix a ceiling water stains. This is part of the Spring 2022 One Room Challenge.

Now that spring has arrived, many of us are doing projects to freshen up our homes. I am excited to join in the Spring One Room Challenge! This bi-annual challenge is a gathering and celebration of home decor bloggers and designers hosted by Linda from Calling It Home. This eight-week design challenge will follow 20 featured designers along with hundreds of guest participants. Each participant is challenged to makeover a space in their home, while sharing their progress along the way. Each week, a wealth of inspiration and creativity is shared!

I am continuing to refresh and update my family room. You can read all about my plan for this room HERE.
A couple of years ago, we had a rough winter here in Connecticut.
We had some ice damning, which resulted in water stains on ceiling in our family room. We made dealing with the cause of the problem our priority. Our roof was replaced, along with rotted clapboards, and the house was painted. But, the ceiling water stain has remained…until now.
The process of removing the water stain from the ceiling was so easy that I wish I had done it so long ago. I am excited to share this simple step by step tutorial with you!
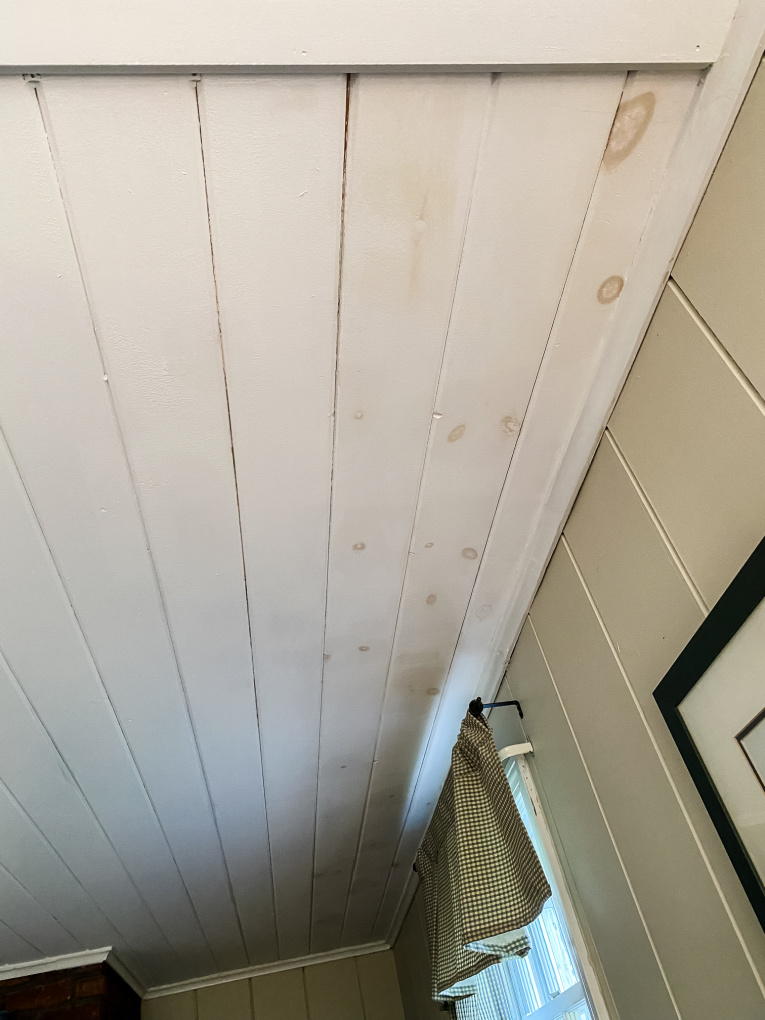
Our Water Stained Ceiling
The ceiling in our family room is made of tongue and groove cedar planks. I love its character, charm, and slight imperfections.
After the water damage occurred, we had it accessed by a professional to be sure it was dried out and the boards were intact. It is imperative that the source of the water stains be identified and corrected. In our case, it was roofing and clapboard that needed repairing.
Once you know the source of the water stains and have corrected it, it is time to fix the ceiling water stains.
Affiliate links are included in this post for your convenience, with no additional cost to you. Thank you for your support! Please see my disclosure policy here.
Materials Needed to Fix Ceiling Water Stains
- Kilz Original Interior Primer (This is an oil-based primer. It is designed to block and seal stain, preventing it from showing through.)
- Drop Clothes
- Ceiling paint
- Paint tray
- Paint tray liners
- small roller with foam cover
- Roller with disposable covers
- Edging paint brush
Process to Fix Ceiling Water Stains
- Ventilate. Be sure to open all windows and make sure the space is well-ventilated.
- Clean the ceiling and all it to dry.
- Prime. Paint the primer over the ceiling water stains. I primed the stained area of the ceiling using Kilz Original Interior Primer. I did give the ceiling water stains three light coats with a small roller with foam cover, allowing the primer to completely dry between coats.
- Paint. Once the primer is completely dry, paint the ceiling. I painted the ceiling with Benjamin Moore Regal Select in the color, Pure White. This paint is a water-based primer and paint in one. Using this product allowed me to only do one coat on the ceiling as I wanted to be sure there was even coverage for those areas that hadn’t been primed with the Kilz Primer. A water-based latex paint may be used over this oil-based primer.
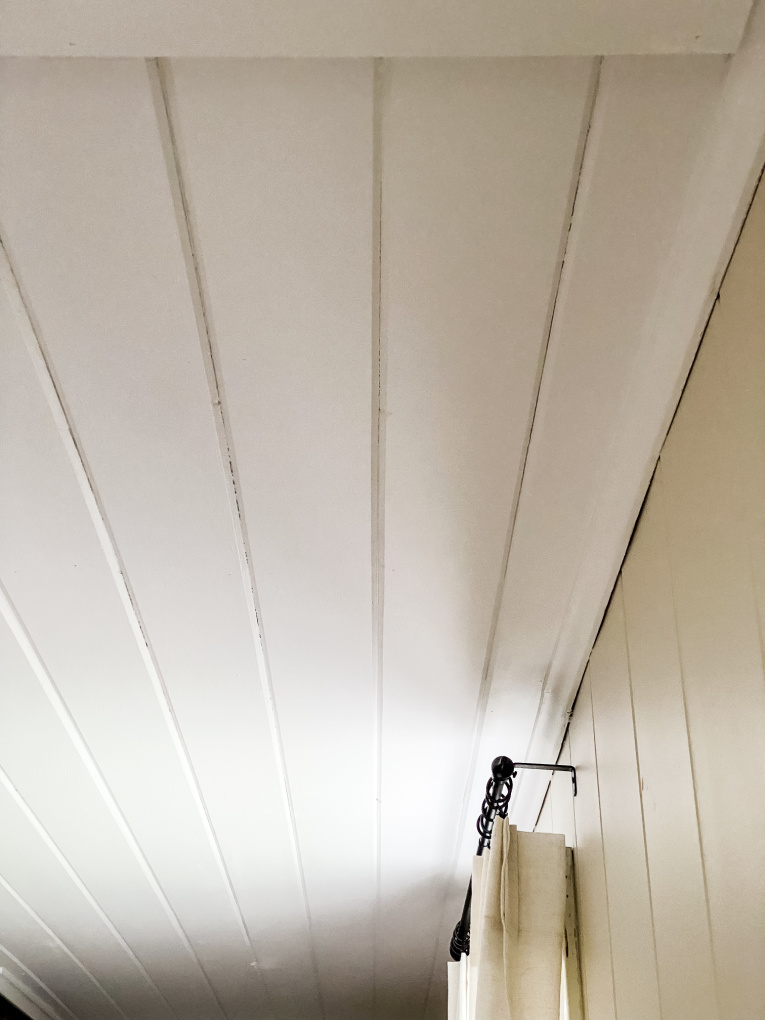
The Ceiling Now
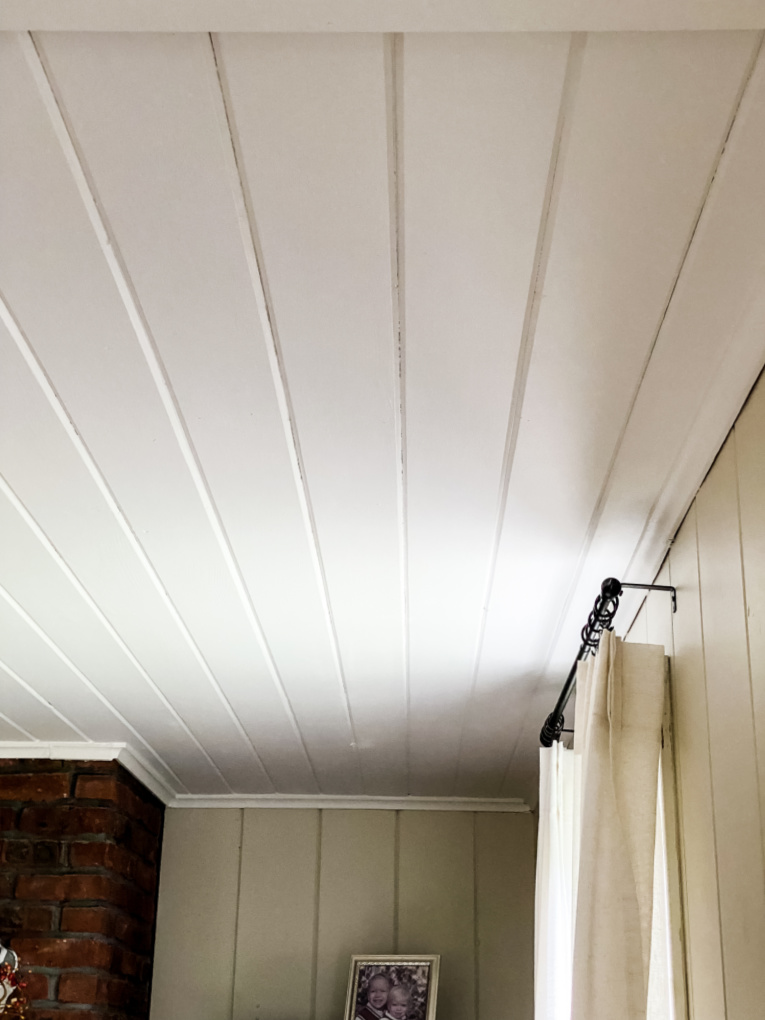
The ceiling is stain-free and now looks so fresh and clean.
After I painted the ceiling, I also painted the walls. We chose a beautiful griege called Edgecomb Gray, by Benjamin Moore. Along with the ceiling, all of the trim was painted Pure White by Benjamin Moore. This is a great neutral backdrop for this room refresh.
I hope that this is helpful to you. Please stop back next week as I share some more progress on this room refresh.
Thank you so much for visiting today. I am so grateful for you! I would love to connect with you on Facebook, Instagram, Pinterest, or here on the blog!