How to Make a Wreath Sash
Learn how to make a wreath sash in minutes. This easy, budget-friendly craft adds a festive touch to your wreath and seasonal décor.

Seasonal décor doesn’t have to be over-the-top to feel special. Sometimes the simplest touches make the biggest impact—like this DIY wreath sash. This easy project adds charm, color, and a festive touch to your wreath and your home.
Best of all? You can make it in under 30 minutes, using simple supplies.
This post contains affiliate links. Please see my disclosure policy here. Thank you for your support.
Why You’ll Love a Wreath Sash
- A great way to decorate an existing wreath
- Simple and budget-friendly
- Adaptable…you can sew it or use fuse tape. For this post, I sewed.
- Easily customizable
- Reusable year after year

A wreath sash is a great alternative if you don’t want to store multiple wreaths for every season—just swap the sash and instantly refresh your look.
Supplies Needed
- Fabric of your choice
- Fabric scissors or a cutting mat and rotary cutter (optional)
- Sewing machine
- Iron-on fabric fuse tape
- Optional embellishments: pom-poms, lace trim, or vinyl lettering
Shop Supplies

Step-by-Step: How to Make a Wreath Sash
Step 1: Choose Your Fabric
Select a fabric that fits your style. For Valentine’s Day, think soft pinks, classic reds, creamy neutrals, or playful patterns. I chose a classic red gingham pattern. I purchased 1 1/2 yards of fabric.
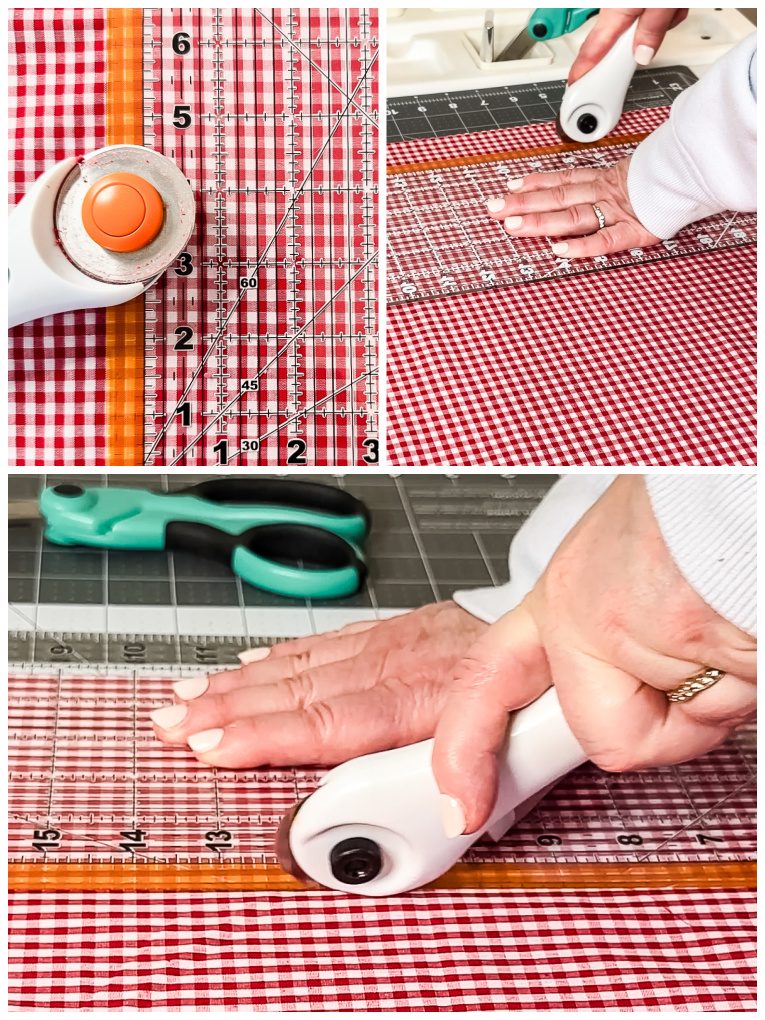
Step 2: Cut to Length
The standard size of a wreath sash is about 4 1/2 inches wide by 52-56 inches long. I planned to make mine 4 1/2 inches wide by 54 inches long, so I cut two pieces 5 inches wide by 54 1/2 inches long, to allow for a 1/4 inch seam.
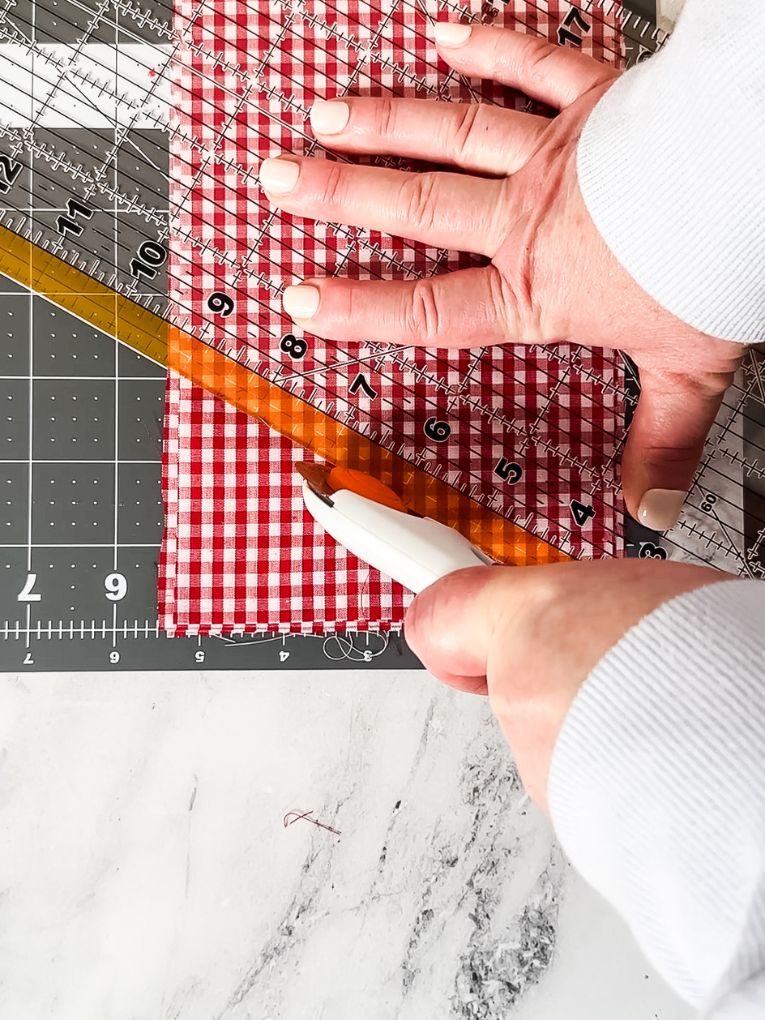
Cut the ends an angle.
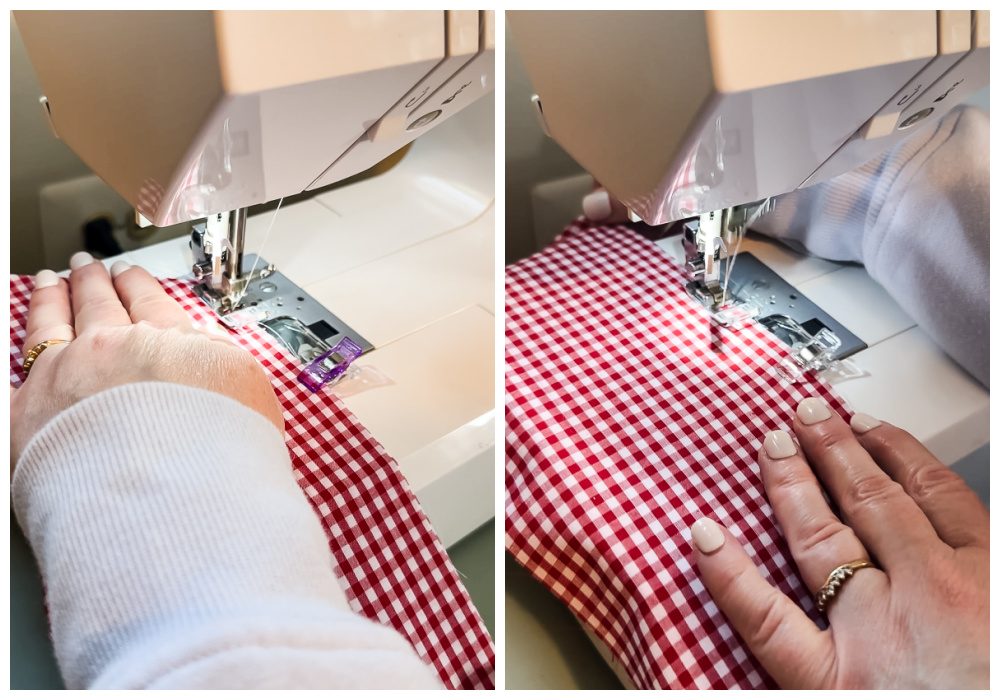
Step 3: Sew the Wreath Sash
Next, put the right sides together and allow a 1/4 inch seam. Sew the banner, allowing a 4 inch gap on one side.
Step 4: Finish the Wreath Sash
Then, turn the wreath sash right side out. Use a pencil to poke the corners out and then press the sash with a warm iron. Either stitch or use fabric fuse tape, following the instructions on the package, to bond the fabric from the 4 inch gap together.
Step 5: Add Decorative Details (Optional)
I left my wreath plain, but you can personalize your sash with:
- Letters or monograms
- Ribbon or ric rac trim
- Iron-on appliques or patches
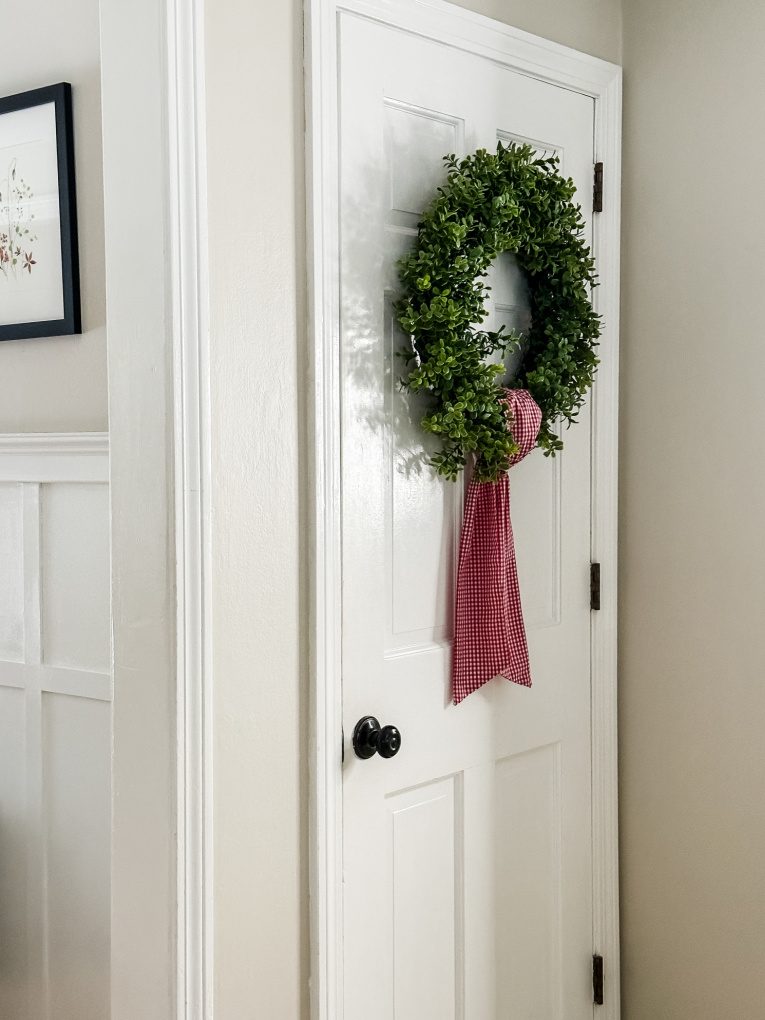
Step 5: Tie Your Wreath Sash
Finally, to tie your wreath sash, follow these simple steps:
- Simply drape the sash over where you want it to sit.
- Let both sides hang down, with one of the sides hanging down lower.
- Bring the longer side around and through to tie it.
- Move the tie to the back and let the sides hang.
Styling Ideas for Your Wreath Sash
- Pair a neutral wreath with a bold colored sash for contrast
- Use a printed pattern fabric on a simple boxwood wreath

Boxwood Wreaths
A DIY wreath sash is such a sweet way to add seasonal charm without cluttering your décor storage. It’s quick, creative, and completely customizable for any home décor style.
I hope you give this Wreath Sash a try! Thank you so much for stopping by the blog today. It truly means the world to me! I would love to connect with you on Facebook, Instagram, Pinterest, or here on the blog!