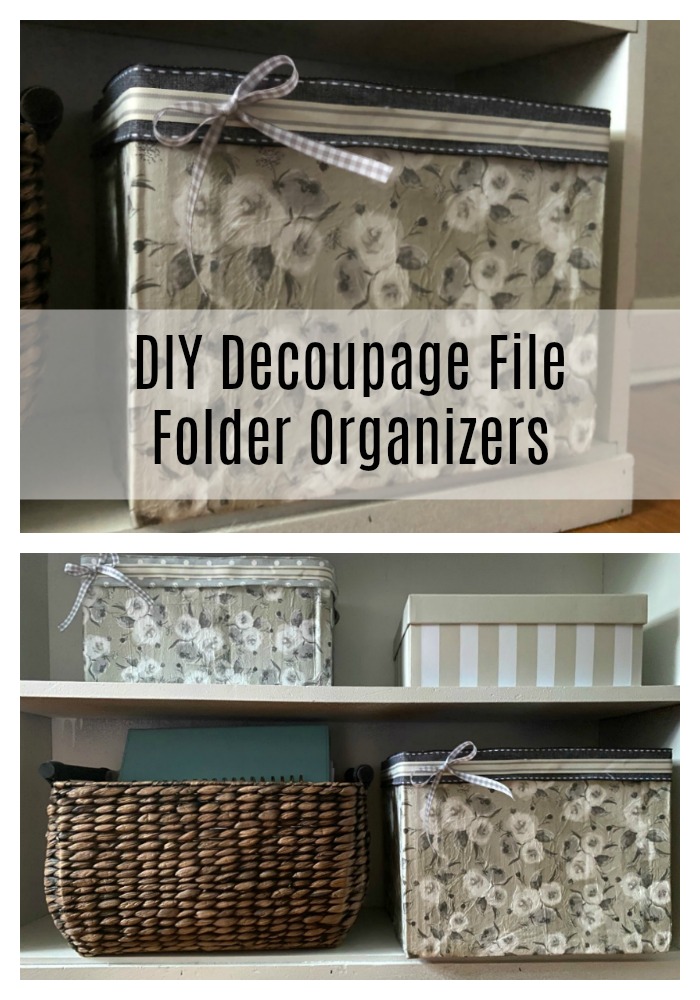
DIY Decoupage File Folder Organizers
Use some boxes and decorative napkins to create your own DIY decoupage file folder organizers for your home!
This post contains affiliate links. If you click on an affiliate link and purchase something, I may receive a small commission, at NO additional cost to you.
Hi there! I hope you are having a great weekend! Now that school has finished and my daughter has graduated, I am focusing on catching up and finishing my home office project for the One Room Challenge! I have added a new cool gray wall color, a fun stenciled accent wall, and painted the furniture. I am so excited that this space is finally coming together. This little space of mine didn’t function well and had no style. With very little money and a little creativity, I have transformed this space and can’t wait to share the final reveal with you.
What this home office needed is some organization tools. Today I am sharing a pretty and inexpensive idea for DIY decoupage file folder organizers. I recently shared it on my Facebook page as part of Craft and Chat Live. This is such an easy DIY and you may have already have the materials!
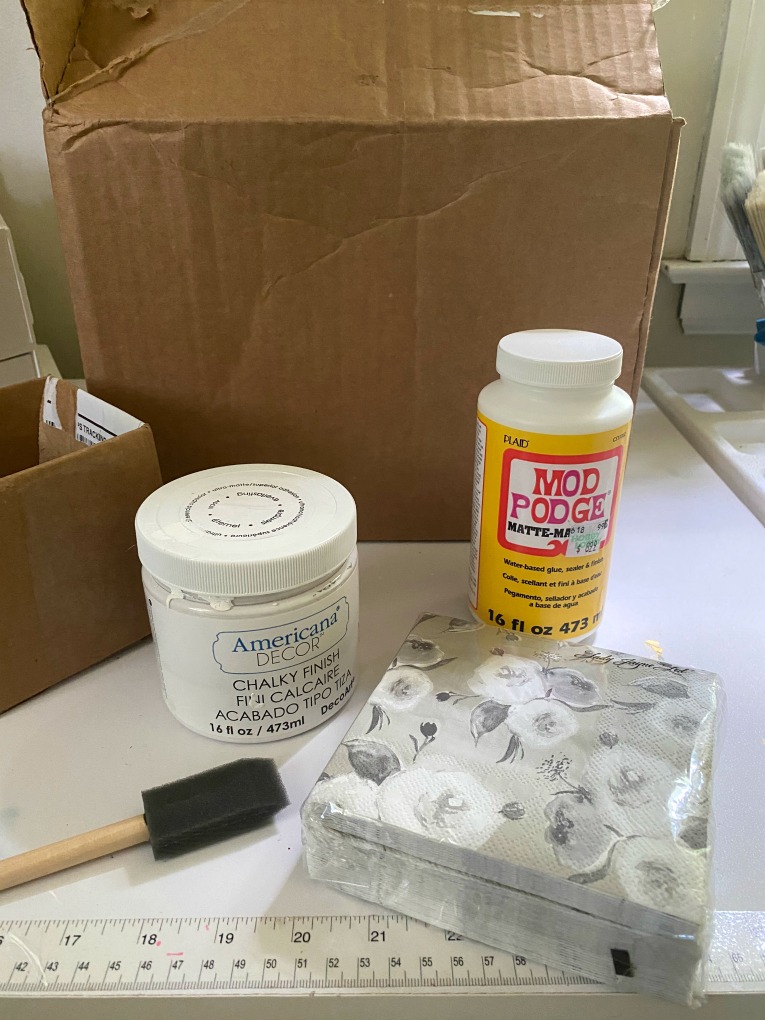
Materials:
- box
- box cutter
- chalk paint
- paint brush
- decorative napkins
- Modge Podge
- foam brush
- ribbon
- glue gun with glue sticks
Directions:
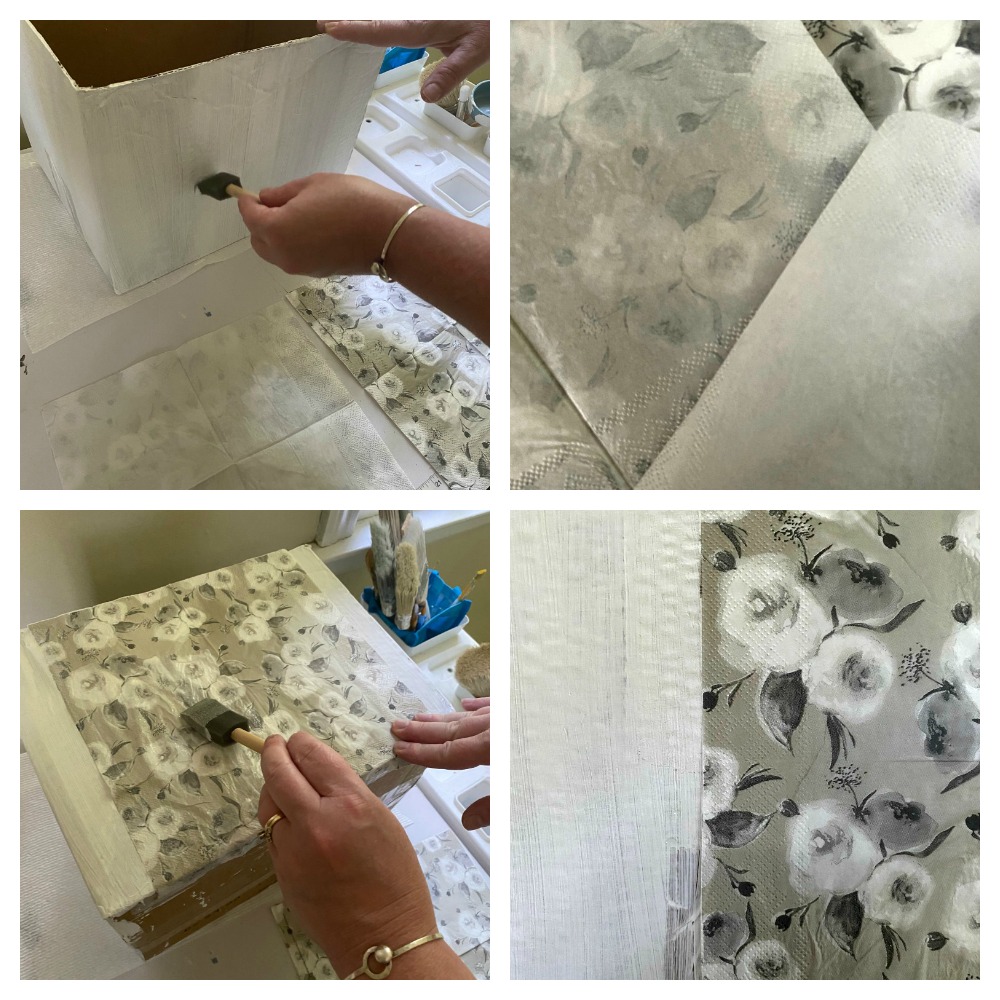
- Cut the tops off of the box.
- Paint the outside of box. I used DecoArt’s Americana Décor Acrylic Chalky Finish Paint in Everlasting White. I chose this color for a solid, neutral background. The chalk paint dries really quickly.
- When the paint is dry, use a foam brush to apply Modge Podge to an area of the box.
- Separate the napkin so you have just one layer of the napkin. Place the napkin onto the area that you applied the Modge Podge. Smooth out and fold the napkin over the top and to the underside so it is completely covered.
- Then, apply Modge Podge to the top of the napkin. I didn’t make mine very smooth because I like the character and imperfections.
- When it is dry, decorate it! I used my glue gun to apply some decorative ribbon to give it a finished look.
The Modge Podge dries to a hard finish and creates a durable finish.
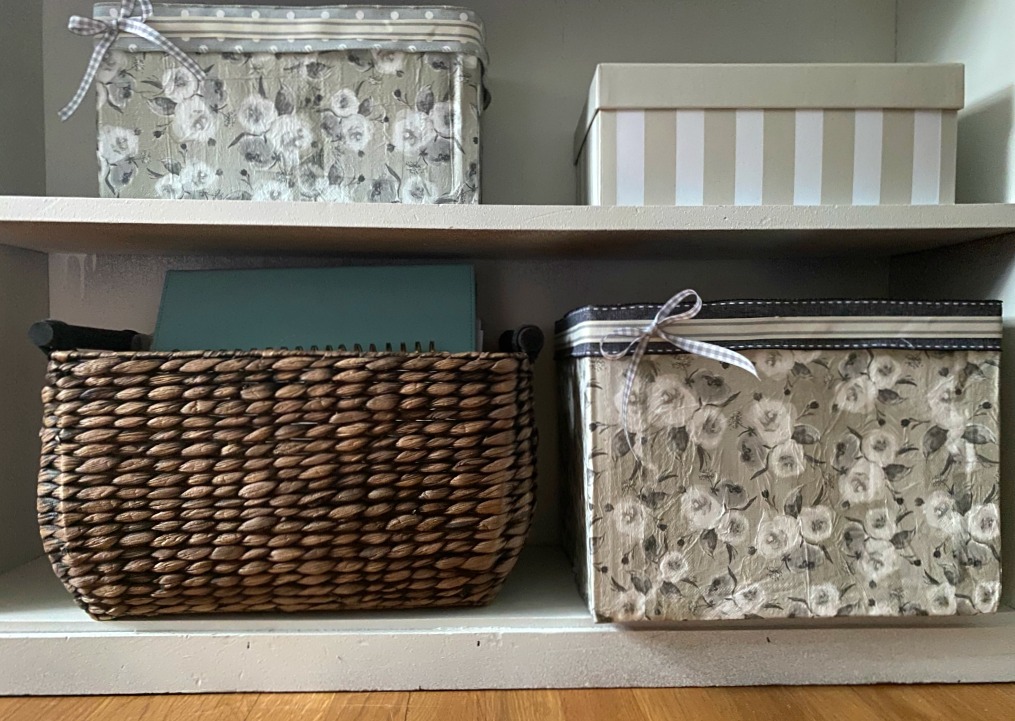
Such pretty boxes! It was so much fun and inexpensive to create these!
It feels SO good to know these beautiful DIY organizers will help me to keep my home office organized and functional. When my space is organized, I feel less stressed and more productive. Do you ever feel that way too?
Do you have any favorite organizers you use to make life easier? I’d love to hear your ideas!
If you would like to save this post for later, pin it here!


This is such a great idea! I’m so glad I came across this. I was getting ready to order something similar for our homeschool year. You just saved me a lot of money. Thank you!!